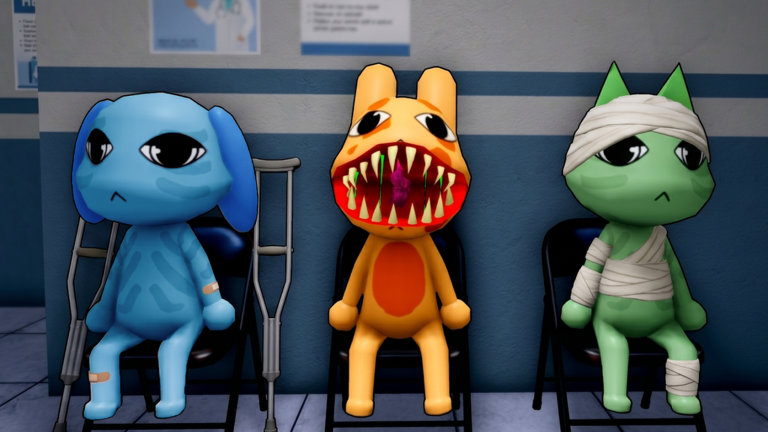
Anomaly Detection
Anomalies are dangerous entities disguised as animal patients. They must be identified and rejected at the Shutter before entering the hospital. One confirmed red flag is enough to reject — you do not need multiple signs.
The Four Examination Layers
Anomalies hide across up to five detection methods. You check each layer in sequence:
- Visual — direct observation at the reception window
- Photo — take a photo and compare it to the patient's in-person appearance
- CCTV/Camera — review security camera footage of the patient in the lobby
- Paperwork/Documentation — check medical records for inconsistencies in name, species, and appointment information
- Audio — listen for distorted or unnatural sounds
Photo and paperwork checks are introduced starting in Shifts 4–6. The Camera Upgrade is required for effective CCTV use from Shift 7 onward.
Response Protocol
- Check window systematically for visual tells
- Take a photo and compare it carefully to the patient
- Review CCTV footage (refresh the view multiple times if checking for Unnatural Body anomaly)
- Verify documentation for name, species, and appointment data
- Lower the shutter decisively as soon as you confirm any single red flag
Visual Anomalies (7 types)
These are detectable immediately at the reception window without any equipment.
| Anomaly | Key Characteristics |
|---|
| Wide Eyes & Sharp Teeth | Distorted, unnatural smile with full sharp teeth, glowing eyes, and a noticeably deep voice |
| Three Eyes | Three glowing red eyes — described as "the most cited must-be-an-anomaly sign" |
| Hollow Face | Pitch-black hollow eyes with constant twitching |
| Unnatural Facial Appearance | Smile looks like it was drawn on; has human-style teeth |
| Twitching | Arms and head twitch constantly; neck is elongated |
| Staring at the Player | Head continuously tracks the player's position |
| Hunched Posture | Obvious hunched stance; rarely appears without other anomaly signs |
Staring at the Player detection tip: Step behind the patient. Real animals do not track your position. An anomaly will fail to follow you when you stand directly behind it — this is a reliable confirmation test.
Appearance anomalies (Wide Eyes & Sharp Teeth, Hollow Face, Hunched Posture, etc.) do not always require equipment to detect. Any visible tell at the window is sufficient to reject.
Photo Anomalies (4 types)
These anomalies look normal in person but reveal tells only when photographed. Take a photo and compare it closely to what you see at the window.
| Anomaly | Identifying Features | Special Note |
|---|
| Incorrect Photo | Eye or ear shape changes; horns are added or missing compared to in-person | No Sanity cost |
| Unnatural Photo | Creepy, overly realistic features that only appear in the photo | No Sanity cost |
| Static Photo | The photo is full of grainy static noise | No Sanity cost |
| Cursed Photo | Bloodshot eyes and a wide grin visible in the photo | Picking it up immediately drains 10 Sanity |
CCTV Anomalies (8 types)
These anomalies appear normal at the window and in photos but show tells only when viewed through the security camera.
| Anomaly | CCTV Signature |
|---|
| Black Eyes | A black band covers the eye area |
| Unnatural Body | Body is stretched or distorted; the distortion re-randomizes each time you reopen the camera view |
| Staring at Camera | Patient maintains direct eye contact with the camera lens while moving around |
| Void/Black | The entire body and eyes appear pitch black |
| Twitching (CCTV) | Elongated neck version of twitching; the camera view itself also twitches |
| Skinwalker on Cam | Appears as a Skinwalker only on CCTV; looks completely normal at the window |
| Different Ears | Ear shape or number mismatches between what you see at the window and on camera |
| Distorted Jaw | Mismatched or distorted jaw visible only on camera |
Tip for Unnatural Body: Reopen the camera view and look again. The distortion re-randomizes each time, so confirm by reopening rather than relying on a single glance.
Paperwork Anomalies
Introduced in Shifts 4–6. Check medical records for inconsistencies in:
- Patient name
- Species listed
- Appointment information
A mismatch in any of these fields is a valid reason to reject.
Audio Anomalies
Distorted or unnatural sounds coming from the patient indicate an anomaly. Audio anomalies can be detected without equipment.
Special Anomaly Types
- Mimic Patient — Mimics the appearance of a real patient
- Hollow Eyes — Anomaly identified by hollow eye sockets
- Missing Appointment — Anomaly with no appointment record in the documentation
- Security Camera Anomalies — The patient appears completely normal at the window and in photos but looks abnormal only on the security camera
Notes from Dr. Harlow
- Anomalies hate having their photo taken
- Anomalies have a need for coffee
- If an anomaly is accidentally healed inside the hospital, it will say "I'm Hungry" and will either exit without attacking anyone or turn and attack another patient
Consequences of Letting Anomalies Through
If an anomaly passes the Shutter and enters the hospital, the following can happen:
- The anomaly becomes a Skinwalker that actively hunts staff and patients
- Letting appearance anomalies through can trigger a Death Ritual
- A Monster may emerge
- The anomaly may turn into a Shapeshifter and attempt to eat patients and any players who get too close
Environmental Decoys
Environmental hazards such as slime and fires are not patient flaws. They are decoys. When judging whether a patient is an anomaly, only consider confirmed tells on the patient itself — not the surrounding environment.
Characters and NPCs
Animal Hospital features several named characters — both recurring patient characters and NPCs that interact with players during shifts.
Patient Characters
Ratthew
A rat patient. Ratthew functions as the primary baseline reference for anomaly detection. By learning what a normal animal patient looks like, players can more easily identify deviations that indicate an anomaly.
Lola
A named recurring patient character encountered during shifts.
Barney
Barney is a serial killer rabbit who first appears after Shift 2.
Barney's visit is a scripted event with three stages:
- First request: Barney asks for coffee
- Second request: Barney asks to receive treatment
- Third request: Barney asks for a hiding location
When Barney requests a hiding location, the player is presented with two narrative choices. The outcome of Barney's visit differs depending on which choice is made.
NPC Characters
The Doctor
The Doctor is an NPC who appears at the end of every shift. The Doctor offers one of two things:
- Supplies for the upcoming shift
- Intel about threats or events coming in the next shift
Paying attention to the Doctor's message each shift helps players anticipate and prepare for what is coming.
The Policeman
The Policeman is an NPC who provides warnings about anomalies and upcoming events during shifts. Their warnings can give advance notice of threats before they escalate.
Classes
There are 10 total classes in Animal Hospital. Intern is free and equipped by default. All Animal Coin classes are purchased from the Class Shop in the lobby. Classes can only be switched from the lobby before a shift begins — they cannot be changed mid-round.
All Classes
| Class | Cost | Perk |
|---|
| Intern | Free | +10 bonus Sanity at the beginning of each shift |
| Nurse | 10 Animal Coins | +1 max inventory capacity |
| Secretary | 120 Animal Coins | Recover 1 Sanity when checking in patients |
| Paramedic | 250 Animal Coins | Start with Large Speed Cola (6 uses) |
| Psychologist | 500 Animal Coins | All Sanity effects are doubled (both positive and negative) |
| Doctor | 900 Animal Coins | Recover 1 Sanity when healing patients |
| Security | 1,250 Animal Coins | Start with X-Taser (5 uses) |
| Head Nurse | 80 Robux | +3 max inventory capacity |
| Surgeon | 2,500 Animal Coins | Gain Sanity and a short speed boost after healing a patient |
| Secret Agent | 320 Robux | Start with a Gun (20 uses) |
Tier Rankings
| Tier | Classes |
|---|
| S | Head Nurse, Surgeon, Security, Secret Agent |
| A | Doctor, Nurse, Secretary, Paramedic |
| B | Intern, Psychologist |
Recommendations by Goal
| Goal | Recommended Class |
|---|
| Best Beginner (F2P) | Nurse — cheap, universally useful; extra inventory helps with all tasks |
| Best Solo (Animal Coins) | Surgeon — every patient healed restores Sanity and provides a speed burst, making the player more stable the more they work |
| Best Solo (alternative) | Doctor — passive Sanity recovery on every heal |
| Best Team — Reception role | Secretary — Sanity recovery per patient checked in rewards a desk-focused playstyle |
| Best Team — Treatment role | Doctor or Surgeon — Sanity recovery through healing |
| Best Team — Defense role | Security or Secret Agent — start with combat items |
| Best Robux purchase (inventory) | Head Nurse — +3 inventory is a large capacity increase for one purchase |
| Best Robux purchase (combat) | Secret Agent — starts every shift with a Gun that has 20 uses |
Recommended Animal Coin Purchase Order
Nurse → Secretary → Paramedic → Doctor → Security → Surgeon
Class Notes
- Psychologist doubles all Sanity effects. This means Coffee heals more, but Cursed Photos, enemy encounters, and Stalker sightings hurt more. High risk, high reward.
- Paramedic's Large Speed Cola provides 6 uses of movement speed boost, useful for quickly moving between the Shutter and treatment rooms.
- Security's X-Taser provides 5 uses against enemies; useful without spending additional cash on a taser from the shop.
- Secret Agent's Gun (20 uses) is the highest-capacity combat weapon available as a starting item.
- Head Nurse previously cost a different amount and was relocated to the 80 Robux tier.
Co-op Gameplay
Animal Hospital supports up to 30 players per server. While solo play is viable in the early shifts, the game is designed around co-op teamwork for higher-difficulty content.
Server Size
- Maximum players per server: 30
Solo vs. Co-op Viability
| Shift Range | Solo Viable? |
|---|
| Shifts 1–6 | Yes — solo play handles all mechanics without requiring role splits |
| Shifts 7–9 | Possible but difficult; role splitting is strongly recommended |
| Shift 10+ | No — co-op role splits and weapon readiness are essential to survive |
Role Splitting
From Shift 7 onward, splitting responsibilities between players dramatically improves survival chances. The two primary roles are:
Desk Operator
- Manages the Shutter and handles patient check-in
- Performs visual inspection, photo comparison, and paperwork verification
- Lowers the Shutter to reject anomalies
- Best paired with Secretary class (Sanity recovery per check-in) or Surgeon/Doctor (treatment Sanity recovery)
Camera Monitor
- Watches CCTV security camera feeds for camera-only anomalies
- Communicates findings to the Desk Operator
- Critical for detecting CCTV anomalies that appear completely normal at the window (e.g., Skinwalker on Cam, Black Eyes, Unnatural Body, Void/Black)
- Camera Upgrade is required for effective monitoring from Shift 7 onward
Additional Roles at Higher Shifts
Shift 10+ requires players to be ready for combat and emergency response. Suggested role distribution for larger teams:
- 1–2 players: Desk Operator(s) managing the Shutter
- 1–2 players: Camera Monitor(s) watching CCTV
- Remaining players: Treatment specialists and emergency responders handling patient care, fires, Death Rituals, and enemy encounters
Communication
Co-op success, especially in the CCTV-monitoring role split, relies on clear communication. The camera monitor must relay anomaly findings to the desk operator in real time so the Shutter is lowered before the anomaly enters.
Enemies and Environmental Hazards
The hospital contains multiple enemy types and environmental hazards that deplete Sanity or endanger patients and staff. Each requires a specific counter strategy.
Primary Enemies (5 types)
1. Skinwalker
A Skinwalker is what an admitted anomaly becomes once inside the hospital. It transforms and actively hunts staff and patients.
- If it attacks you: Press E repeatedly to fight it off (this costs Sanity)
- If it is attacking a patient: Hold E from behind to stop it
2. Black Bunny
An environmental enemy that drains Sanity or blocks progress. Encountered inside the hospital.
3. Eyeless
An environmental enemy that drains Sanity. Encountered inside the hospital.
4. Stalker
Introduced in Shifts 7–9. The Stalker is a persistent threat that causes Sanity damage if you look directly at it.
- Never look directly at the Stalker
- Looking at it causes immediate Sanity damage
5. Bed Monster
Blocks routes and drains Sanity.
- Counter: Approach it while carrying Maple Syrup; the Bed Monster will disappear
Environmental Hazards
Green Sludge
Appears on floors or surfaces.
- Counter: Hold E while standing near it to clear it
Wall Bangers
Found attached to walls. Attempting to push them away without the right item causes heavy Sanity loss.
- Counter: Interact using coffee or food items; holding E without these items causes heavy Sanity loss
Ceiling Monsters
Found on the ceiling. Looking upward causes Sanity damage.
- Counter: Keep the camera pointed down; avoid looking up while in affected areas
Wall Anomalies
Anomaly entities attached to walls.
- Counter: Aggro the Wall Anomaly to draw its attention, then run away and keep moving until it disappears
Surgery Tentacles
Appear during surgery in Room 8.
- Counter: Do not shoot or taser them — this does not help. Continue and finish the surgery mini-game; completing the surgery makes them go away
Fire in Room
Fire can break out in hospital rooms and deals 1 Sanity damage per second while it burns.
- Counter: Hold E near the fire to clear it, or use a Fire Extinguisher item for faster removal
Full Counter Reference Table
| Enemy / Hazard | Counter Strategy |
|---|
| Green Sludge | Hold E to clear |
| Skinwalker (attacking you) | Press E repeatedly (costs Sanity) |
| Skinwalker (attacking patient) | Hold E from behind |
| Bed Monster | Approach with Maple Syrup to make it disappear |
| Wall Bangers | Interact using coffee or food; holding E without items causes heavy Sanity loss |
| Ceiling Monster | Keep camera pointed down; do not look up |
| Wall Anomaly | Aggro it, then run until it disappears |
| Surgery Tentacles | Do not shoot or taser; finish the surgery mini-game |
| Stalker | Never look directly at it |
| Fire in Room | Hold E to clear, or use Fire Extinguisher (1 Sanity/sec while burning) |
| Black Bunny | Avoid or manage via Sanity recovery |
| Eyeless | Avoid; manage Sanity via Coffee and food |
Events and Emergencies
During shifts, special events and emergencies occur that require immediate or time-sensitive responses. Emergencies have strict timers and cause failure if not resolved quickly. Events have more lenient timelines.
Emergencies
Emergencies require immediate action. Failing to respond within the time limit results in severe consequences.
Fainting Patients
A patient collapses and must be carried to a treatment room.
- Action: Pick up the patient and carry them to a treatment room
- Timer: 60 seconds
Patient on Fire
A patient is on fire and requires two steps to treat.
- Action:
- Extinguish the fire on the patient
- Take a photo of the patient
- Administer Ointment to complete treatment
Death Ritual
Candles appear around a patient (or in the hospital) and must all be extinguished quickly.
- Action: Extinguish all candles before the timer expires
- Timer: 60 seconds
- Cost: Each candle extinguished costs 1 Sanity
Critical Patient
A patient is in critical condition and must be moved to a specific room immediately.
- Action: Move the patient to the required medical room
- Timer: 120 seconds
Events
Events are less punishing than emergencies and allow more time to respond.
Fire in Room
A fire breaks out inside one of the hospital rooms.
- Action: Hold E near the fire to extinguish it, or use a Fire Extinguisher item
- Ongoing damage: 1 Sanity lost per second while the fire is still burning
Ambulance (Post-Shift 4)
An ambulance arrives, delivering multiple patients simultaneously rather than one at a time.
- Unlocks: Available from Shift 4 onward
- Challenge: You must process and screen multiple patients in quick succession
Barney Event (Post-Shift 2)
Barney, a serial killer rabbit, visits the hospital.
- Unlocks: Available from Shift 2 onward
- Sequence: Barney makes three requests in order:
- Coffee
- Treatment
- A hiding location
- Choice: Two narrative choices are available when Barney asks for a hiding location. The outcome differs depending on which choice you make.
Summary Table
| Event / Emergency | Type | Timer | Key Action |
|---|
| Fainting Patients | Emergency | 60 seconds | Carry to treatment room |
| Patient on Fire | Emergency | — | Extinguish, photo, administer Ointment |
| Death Ritual | Emergency | 60 seconds | Extinguish all candles (1 Sanity each) |
| Critical Patient | Emergency | 120 seconds | Move to required medical room |
| Fire in Room | Event | Ongoing | Hold E or use Fire Extinguisher |
| Ambulance | Event (Shift 4+) | Lenient | Screen multiple simultaneous patients |
| Barney | Event (Shift 2+) | Lenient | Coffee → Treatment → Hiding choice |
Getting Started
Animal Hospital (Anomaly) 🧪 is a co-op survival horror game on Roblox developed by studio Animal Anomaly, with developer Roytt credited. Players work the night shift at a veterinary clinic as interns. The core objective is to survive as many shifts as possible without letting Sanity drop to 0.
What You Do
You work as an intern at an animal hospital. Your two main responsibilities are:
- Screen patients at the Shutter — Inspect incoming animal patients and decide whether to admit them (real animals) or reject them (anomalies in disguise).
- Treat admitted patients — Transport real patients to treatment rooms and complete medical procedures to heal them.
The more anomalies you successfully reject and the more patients you treat without anyone dying, the more cash and Animal Coins you earn.
Controls
| Action | Key |
|---|
| Move | W, A, S, D |
| Jump | Space |
| Item Interaction | E |
The Gameplay Loop
Each shift follows this sequence:
- Stand at the reception desk (the Shutter)
- Inspect the incoming animal patient visually for any irregularities
- Photograph the patient and compare the photo to their in-person appearance
- Check their appointment paperwork for inconsistencies
- Review CCTV footage of the patient in the lobby
- Make a decision — admit or reject using the Shutter button
- Transport admitted patients to the correct treatment room
- Complete the treatment mini-game for that room to heal the patient
- Repeat until the shift ends
- At the end of each shift, the Doctor NPC visits and offers supplies or information about upcoming threats
The Shutter
The Shutter is the check-in window where you accept or reject visitors. To reject a patient you believe is an anomaly, press the Shutters button on the left side of the desk. This lowers the shutters and the entity will leave.
One confirmed red flag is enough to reject. You do not need to find multiple anomaly signs before lowering the shutter.
Shift Structure
Shifts progress sequentially, becoming more complex over time:
| Bracket | What Changes |
|---|
| Shifts 1–3 | Baseline gameplay; visual inspection only |
| Shifts 4–6 | Photo and paperwork checks are added; Ambulance event becomes possible |
| Shifts 7–9 | Environmental hazards introduced; the Stalker enemy appears; Camera Upgrade becomes required |
| Shift 10+ | Co-op role splitting becomes essential; weapon readiness required |
Developer Info
- Developer: Animal Anomaly studio (Roytt)
- Visits: 184.5M
- Favorites: 509.1K
- Max Players per Server: 30
- The game was newly launched and actively seeks bug reports from players
Sanity System
Sanity is a personal meter that represents your mental stability. Reaching 0 Sanity ends your run immediately. Maintaining high Sanity is one of the most important survival priorities in the game.
How Sanity Works
- Sanity starts at 100 at the beginning of each shift (Intern class adds +10 bonus, starting you at 110)
- Sanity decreases from negative events and increases from restorative actions
- Reaching 0 Sanity ends the current run
- Players should aim to stay above 40% Sanity to remain safe
What Drains Sanity
| Source | Details |
|---|
| Jumpscares | Encountering unexpected hostile entities |
| Skinwalker attacks | Pressing E to fight off a Skinwalker costs Sanity |
| Stalker sightings | Looking directly at a Stalker causes immediate Sanity damage |
| Ceiling Monsters | Looking upward in their presence causes Sanity damage |
| Wall Bangers | Holding E near a Wall Banger without coffee or food causes heavy Sanity loss |
| Cursed Photo | Picking up a Cursed Photo immediately drains 10 Sanity |
| Neglected patients | Failing to treat patients in time |
| Death Ritual candles | Each candle extinguished during a Death Ritual costs 1 Sanity |
| Fire in Room | Deals 1 Sanity damage per second while burning |
| Treatment errors | Administering wrong items during patient treatment |
What Restores Sanity
| Source | Details |
|---|
| Coffee | Primary Sanity restoration item; highest shop priority |
| Food | Restores Sanity; also used to counter Wall Bangers |
| Secretary class | Recover 1 Sanity each time you check in a patient |
| Doctor class | Recover 1 Sanity each time you heal a patient |
| Surgeon class | Gain Sanity (plus a speed boost) after healing a patient |
| Intern class | +10 bonus Sanity at the start of each shift |
The Psychologist Class and Sanity
The Psychologist class doubles all Sanity effects — both positive and negative. This means:
- Coffee and food restore twice as much Sanity
- Enemy encounters, Cursed Photos, and Stalker sightings drain twice as much Sanity
This class is high risk and high reward; it is rated B-Tier because the amplified negative effects can quickly end a run if threats are mishandled.
Sanity Management Tips
- Buy Coffee first in the shop before any other item — it is the single most important resource for maintaining Sanity
- Never look directly at Stalkers — the Sanity drain is immediate
- Keep your camera pointed down in rooms with Ceiling Monsters
- Bring coffee or food when dealing with Wall Bangers — interacting without items causes heavy Sanity loss
- Avoid getting hit by Skinwalkers when possible, since fighting them off costs Sanity; use the hold-E-from-behind method when stopping a Skinwalker attacking a patient
- Pick up Cursed Photos cautiously — the -10 Sanity cost is immediate and unavoidable once you pick it up; make sure you have enough Sanity buffer before touching one
- Use the Surgeon or Doctor class if you want passive Sanity recovery built into your playstyle through treatment
Shift Progression
Shifts progress sequentially, with each bracket introducing new mechanics, events, and threats. Understanding what each bracket adds helps you prepare the right equipment and strategies.
Shift Brackets
Shifts 1–3: Baseline
The foundational gameplay phase. New players learn the core loop here.
- Anomaly detection: Visual inspection only
- Treatment rooms: All 8 rooms available
- Events: None of the timed events are active yet
- Enemies: No Stalker; environmental hazards minimal
- Recommended class: Nurse (cheap, boosts inventory)
Shifts 4–6: Expanded Checks
New verification requirements are added, increasing the complexity of patient screening.
- New mechanics: Photo verification and paperwork checks are required
- New event: Ambulance event becomes available (multiple patients arrive simultaneously)
- Anomaly detection: All five layers now active (visual, photo, camera, paperwork, audio)
- Solo viability: Solo play is still viable through the end of Shift 6
- Preparation tip: Make sure you understand how to check photos and appointment records before reaching Shift 4
Shifts 7–9: Environmental Threats
Environmental hazards and the Stalker enemy are introduced, significantly raising the danger level.
- New enemy: Stalker (never look directly at it)
- New hazards: Ceiling Monsters and additional environmental threats
- Required item: Camera Upgrade — strongly recommended before entering this bracket
- Co-op tip: Role splitting is recommended from this point; having one player at the desk and one on cameras improves efficiency and safety
Shift 10+: Co-op Required
The highest difficulty bracket demands coordinated team play and weapon readiness.
- Co-op: Role splitting between desk operator and camera monitor becomes essential
- Weapons: Taser, Gun, and other combat items should be prioritized and ready
- Complexity: All prior systems (visual, photo, camera, paperwork, audio anomalies, all events, all enemies) are simultaneously active
Barney and Ambulance Unlock Points
| Event | Unlocks At |
|---|
| Barney | Post-Shift 2 |
| Ambulance | Post-Shift 4 |
Solo vs. Co-op Viability
| Shift Range | Solo Viable? |
|---|
| Shifts 1–6 | Yes |
| Shifts 7–9 | Possible but difficult; role splitting strongly recommended |
| Shift 10+ | No; co-op role splits and weapon readiness are essential |
End-of-Shift Doctor Visit
At the end of every shift, the Doctor NPC visits and either:
- Provides supplies for the upcoming shift
- Shares intel about threats or events coming in the next shift
Pay attention to what the Doctor says — their information can help you prepare for the specific challenges ahead.
Shop, Items, and Currency
Currencies
Animal Hospital uses three currencies:
| Currency | How to Earn | How to Spend |
|---|
| Animal Coins | Earned by completing shifts; permanent across sessions | Purchasing classes from the Class Shop in the lobby |
| Cash | Earned within a shift by correctly rejecting anomalies and successfully treating patients | Purchasing consumables and equipment from the in-shift shop |
| Robux | Roblox premium currency; purchased with real money | Purchasing premium classes (Head Nurse, Secret Agent) |
The more anomalies you prevent and the more patients you treat without deaths, the more points you earn at the end of each shift — and the more cash you receive for the shop.
Shop Priority (Recommended Spending Order)
- Coffee — highest priority; primary method of Sanity restoration
- Medkit — heals you after being attacked by Skinwalkers or other enemies
- Camera Upgrade — required for effective CCTV anomaly detection from Shift 7 onward
All Items
| Item | Use |
|---|
| Coffee | Restores Sanity; also a desired item for anomalies (they have a need for coffee) |
| Food | Restores Sanity; also used to interact with Wall Bangers |
| Medkit | Heals the player after being attacked |
| Camera Upgrade | Improves CCTV viewing capability; required from Shift 7 onward |
| Fire Extinguisher | Extinguishes fires in rooms faster than holding E |
| Taser | Combat weapon against enemies |
| X-Taser | Extended taser with 5 uses; Security class starts with one |
| Gun | Combat weapon; 20 uses; Secret Agent class starts with one |
| Eye Drops | Medical supply administered during patient treatment |
| IV Drops | Medical supply administered during patient treatment |
| Maple Syrup | Used against Bed Monsters; approach a Bed Monster with it to make it disappear |
| Scalpel | Used during surgical procedures in Room 8 |
| Large Speed Cola | Provides a movement speed boost; 6 uses; Paramedic class starts with one |
| Ointment | Administered to burned patients after their fire is extinguished |
Inventory
Your inventory capacity determines how many items you can carry at once.
- Intern, Secretary, Paramedic, Psychologist, Doctor, Security: Base inventory
- Nurse: +1 inventory slot (base + 1)
- Head Nurse: +3 inventory slots (base + 3)
Increasing inventory capacity allows you to carry more items simultaneously, which is especially valuable for players handling both treatment and emergency responses.
Treatment System
After a real patient passes inspection at the Shutter, they must be transported to a treatment room and healed using a medical procedure. Each room type has its own mini-game.
Critical Rule
Administering the wrong item causes the patient to die and you lose progress. Always use the correct item for each patient.
Treatment Rooms Overview
Treatment rooms are numbered 1 through 8. Each room handles a specific type of treatment.
| Room | Type | Procedure |
|---|
| Rooms 1–5 | DNA Treatment | Analyze DNA using the computer, then administer the correct items in any order |
| Room 6 | X-Ray | Complete a sequence mini-game by clicking flashing squares in the correct order, then administer items |
| Room 7 | Heart Monitor | Click white icons while avoiding skulls until the meter reaches 100%, then administer items |
| Room 8 | Surgery | Time-limited procedure; follow on-screen instructions for item administration; cannot leave the room until the surgery is complete |
Room-by-Room Details
Rooms 1–5: DNA Treatment
- Use the computer in the room to analyze the patient's DNA
- The computer identifies which items to administer
- Administer the correct items in any order — order does not matter for DNA treatment
Room 6: X-Ray
- A sequence mini-game begins when you start the procedure
- Flashing squares appear on screen; click them in the exact order they flash
- After completing the sequence, administer the required items to the patient
Room 7: Heart Monitor
- White icons appear on screen; click them as they appear
- Skull icons also appear — do not click the skulls
- Keep clicking white icons until the heart monitor meter reaches 100%
- Once the meter is full, administer the required items to the patient
Room 8: Surgery
- The surgery is time-limited — you must complete it before the timer runs out
- Follow the on-screen instructions to know which items to administer and when
- You cannot leave the surgery room until the procedure is fully complete
- Surgery Tentacles may appear during the procedure — do not shoot or taser them; finish the surgery mini-game to make them go away
Leaving Rooms During Recovery
Players may leave treatment rooms during patient recovery periods. The one exception is surgery: you must remain in Room 8 until the surgery is complete.
Critical Patients
Critical Patients are an emergency type that requires you to move the patient to the required medical room within 120 seconds. This is treated as an emergency with a strict timer rather than a standard treatment workflow.
Medical Items Used in Treatment
| Item | Use |
|---|
| Eye Drops | Administered during certain treatment procedures |
| IV Drops | Administered during certain treatment procedures |
| Scalpel | Used during surgical procedures |
| Ointment | Administered to burned patients after extinguishing the fire on them |