There are currently 21 active Volleyball Legends codes, last checked September 3, 2026.
✓ Codes checked September 3, 2026
Code
Reward
Status
Date
BLOCKED
5 Lucky Ability Spin
✓ Working
29/08/2026
SHIRO
5 Lucky Style Spin
✓ Working
29/08/2026
UPDATE_85
5 Lucky Style Spin
✓ Working
29/08/2026
PIRATE_SZN
5 Lucky Ability Spin
✓ Working
22/08/2026
SEASON_18
5 Lucky Style Spin
✓ Working
22/08/2026
UPDATE_84
5 Lucky Style Spin
✓ Working
22/08/2026
SCHOOL_SOON
5 Lucky Ability Spins
✓ Working
16/08/2026
MIKAGE_REVIVED
5 Lucky Style Spins
✓ Working
16/08/2026
UPDATE_83
5 Lucky Style Spins
✓ Working
16/08/2026
JETPACK
5 Lucky Ability Spin
✓ Working
08/08/2026
ROKETTO
5 Lucky Style Spin
✓ Working
08/08/2026
UPDATE_82
5 Lucky Style Spin
✓ Working
08/08/2026
ENCHO_NERF
5 Lucky Ability Spins
✓ Working
07/08/2026
HIDARI_FINALLY
5 Lucky Style Spins
✓ Working
07/08/2026
UPDATE_80
5 Lucky Style Spins
✓ Working
07/08/2026
KNEE_SLIDE
5 Lucky Ability Spins
✓ Working
07/08/2026
LEAD_FEET_AGAIN
5 Lucky Style Spins
✓ Working
07/08/2026
UPDATE_81
5 Lucky Style Spins
✓ Working
07/08/2026
FESTIVAL_UPD
5 Lucky Ability Spins
✓ Working
27/07/2026
SEASON_17
5 Lucky Style Spins
✓ Working
27/07/2026
UPDATE_79
5 Lucky Style Spins
✓ Working
27/07/2026
Know a code we missed?
1Launch [UPD] Volleyball Legends on Roblox and join any server
2Look for the Twitter bird or gift box icon on the side of the screen
3Click it to open the code redemption menu
4Type or paste your code exactly as shown above
5Press Redeem — your reward appears instantly
Code
Reward
Status
Date
BACK_TILT
-
✗ Expired
07/08/2026
FREE CLAIM
5 Lucky Style Spins
✗ Expired
07/08/2026
UPDATE_77
5 Lucky Style Spins
✗ Expired
27/07/2026
RIKU
5 Lucky Style Spins
✗ Expired
27/07/2026
HOLO_WALLS
5 Lucky Ability Spins
✗ Expired
27/07/2026
UPDATE_78
5 Lucky Style Spins
✗ Expired
27/07/2026
LEADERBOARD
5 Lucky Style Spins
✗ Expired
27/07/2026
NEW_PACK
5 Lucky Ability Spins
✗ Expired
27/07/2026
NEW STYLE - SHIRO
SHIRO is the latest style being added to Volleyball Legends. From his years of experience on the court, he's developed an INSANE block receive. Remember the days of prime jumpset blocking?? Unc still got it 😁
Shiro can switch between two blocking modes, similar to Feiko. SLAM - MAX Block BOOST - Insane spike power + gravity boost on the next spike. If the ball is not spiked on the next touch, the ball will still have a small spike buff (different than Taichou).
2x Lucky Event
ANOTHER 2X Luck event incoming so y'all can get the styles & abilities you want
FROM Aug 29th, 2026 11:30 AM ET to Aug 31st 2026 11:30 AM ET
SECRET PITY IS HALVED: 200 -> 100 SECRET STYLE/ABILITY CHANCES ARE DOUBLED: 0.5% -> 1%
Hurry, this event only lasts 48 hours!
LUCKY STYLE/ABILITY SPIN HANDOUT
LUCKY STYLE/ABILITY SPINS ARE BEING HANDED OUT from Aug 29th, 2026 10:30 AM ET to Aug 29th, 2026 12:30 AM ET Every 10 mins!!! 12 lucky spins total... ❤️
These can extend rallies, break defensive reads, or create immediate attacking pressure.
Ability
Best For
Keep If
Reroll If
Paired Style
Magnetic Pull
Blocker / Receiver
You stay near the ball and can time the magnetic radius around receive, block, or net play
You want a simple instant finisher and rarely read next-touch position
Mikage, Encho, or Yogan
Extra Touch
Receiver / All-rounder
Your team loses points from messy first touches and you can turn extra time into a clean set
Your rallies already reach a clean spike but lack a point-ending tool
The Twins, Taichou, or Encho
Minus Tempo
Setter / Spiker
You can coordinate quick sets or attack timing instead of waiting for obvious high balls
You solo queue with teammates who never read tempo changes
Kijo, Taichou, or Jinko
Shield Breaker
Spiker
Your chosen role is closing rallies and you can hide activation until the spike matters
You're losing points before the ball ever reaches your attack lane
Sanu, Kazana, or Hidari
Divine Strength
Spiker / Server
You already get playable sets and need more force behind spikes or serves
Your issue is positioning, ball control, or teammate setup
Kazana, Jinko, or Sanu
2. Tier Secret — Limited Secret Ability
Ability
Notes
Lead Feet
Limited Secret ability. Launched Update 56, returned Update 69. Availability ended — requires fresh source check before any chase. Multi-use charge pressure; best for Spiker/Blocker. Paired with: Sanu, Jinko, Kazana.
3. Tier A — Strong but Timing-Heavy
Good in ranked when the user understands spacing, set height, and block timing.
Ability
Best For
Notes
Curve Spike
Spiker / Server
Curved attack lanes; value drops if you can't control direction
Zero Gravity Set
Setter
Higher setup windows; only as useful as the teammate who attacks it
Moonball
Setter / All-rounder
Safer rally control; slow balls can become free balls against organized defenders
Boom Jump
Blocker / Spiker
Vertical pressure for high contact; jump height doesn't replace early reads
4. Tier B — Situational Utility
Useful for specific roles, less consistent as a main win condition.
Ability
Best For
Notes
Redirection Jump
Receiver / All-rounder
Situational recovery for broken rallies
Super Sprint
Receiver
Mobility for late arrivals; can cause out-of-position play
Steel Block
Blocker
Front-line denial; value falls when attackers mix timing and direction
Rolling Thunder
Receiver
Defensive recovery; needs strong follow-up set and spike
5. Ability Decision by Rally Problem
Repeated rally problem
Start with
Decision
First touch keeps breaking
Magnetic Pull, Extra Touch, or Rolling Thunder
Keep if ability extends rallies; practice receive if ball is missed before ability activates
Clean spikes need pressure
Shield Breaker, Divine Strength, or Curve Spike
Reroll only if account already gets clean sets but still can't finish points
Second touch feels rushed
Minus Tempo, Moonball, or Zero Gravity Set
Choose tempo control before chasing a finisher
Net timing loses points
Steel Block, Boom Jump, Lead Feet, or Magnetic Pull
Separate ability value from late jumps, camera mistakes, or wrong-lane blocks
Near Secret Ability pity
Current playable ability + saved Lucky Ability Spins
Secret Ability pity is randomized — don't treat it as a chosen target guarantee
6. Beginner Ability Rule
If you cannot reliably receive, set, and block yet, choose forgiving utility (Extra Touch, Magnetic Pull) before chasing a flashy finisher. Consistency makes free code spins more valuable.
14. ABILITY KEEP / REROLL GUIDE
1. Ability Keep-or-Reroll Checklist
Problem
Keep if you own
Reroll only if
First-touch safety
Extra Touch, Magnetic Pull, or Rolling Thunder
Rally still dies on receive after 3 matches and ability never affects second touch
Attack finish
Shield Breaker, Divine Strength, or Curve Spike (if sets are already clean)
You rarely get clean spike chances (issue is set timing or role fit)
Setter tempo
Minus Tempo, Zero Gravity Set, or Moonball
Team has no assigned setter or you're using a finisher to solve a tempo problem
Block / net
Steel Block, Boom Jump, Lead Feet, or Magnetic Pull
Blocks are late because of camera, jump timing, or wrong lane — not ability value
Mixed movement
Super Sprint, Redirection Jump, or Magnetic Pull
Movement tool creates chaos because player hasn't locked a role
2. Ability Reroll Stop-Loss
Same 3-match rule applies. After receiving Lucky Ability Spins, note the repeated rally problem, check pity, and set a stop-spin count before rolling.
4. BEGINNER GUIDE
1. First 20 Minutes Route
Time
Goal
Action
0–5 min
Learn inputs
Practice serve, receive, set, spike, block, and dive slowly before blaming styles
5–10 min
Name misses
Label each miss (receive, set, spike, block, positioning) — do not reroll yet
10–15 min
Level 15 gate
Use early casual matches to reach Level 15 before judging code box failures
15–20 min
Route rewards
After redeeming codes, separate Lucky Style Spins from Lucky Ability Spins before spending
After 20 min
Pick a role
Choose one starter role for ranked practice instead of switching every match
2. First Day Progression Route
Stage
Goal
Action
First login
Learn the input chain
Serve, receive, set, spike, block, dive until each miss has a name
Before Level 15
Make codes useful later
Play casual matches; avoid judging code failures before Level 15
After codes
Route rewards safely
Separate Style Spins from Ability Spins; choose the weaker slot before rolling
First role
Stop chasing every touch
Pick one role for one practice block
Before ranked
Avoid tilt queueing
Confirm touch order, one reliable serve, and one role job first
3. Safe Reward Spending Order
Confirm Level 15 and redeem current codes.
Name the weak slot — if rallies fail before style/ability matters, practice first.
Choose style or ability deliberately: style spins fix role fit; ability spins fix a rally-support gap.
Check pity and set a stop point.
Retest in 3 matches — keep the build if it improves the same visible problem at least twice.
4. Common Beginner Mistakes
Mistake
Fix
Route
Serve goes out or hits too low
Focus on second-press timing
Serve timer
You chase every ball
Pick a role and let teammates have their touches
Role picker
Redeemed codes but can't choose a pool
Compare current style vs ability fit before rolling
Spin calculator
Don't know the input chain
Review PC/console controls first
Controls guide
5. Choose a Starter Role
Receiver — if your team keeps losing first touch
Setter — if attacks never become playable
Spiker — if you can time jumps and want scoring pressure
Blocker — if you enjoy reading hitters at the net
All-rounder — if you're still learning where you belong
5. CONTROLS
1. Official Control Map (PC & Console)
Action
PC
Console
Use it for
Bump / Spike
Left Click
RT
Ground first touch, or midair spike
Set / Block
Q
LT
Controlled set on the ground, or block midair
Dive
CTRL
X
Emergency reach for balls you can't cover on foot
Serve Start
Left Click
RT
Start serve when the game gives you the ball
Serve Power
Left Click
RT
Press again to choose power (spike serve or bump serve)
2. Serving Rhythm
Start the serve (Left Click / RT).
Press again to choose power (Left Click / RT).
Decide: jump and spike serve, or let the ball drop into a safe bump serve.
Add directional tilt only after power timing is repeatable.
7–11 min: Practice first touch. Late footwork → receive guide; panic dive → mobile controls or settings.
11–15 min: Choose one role for the next match.
7. GAME MODES
1. Mode Overview
Player Intent
Mode
Best Next Page
Learn controls or first role
Casual Matches
Beginner guide
Queue with pressure and teammates
Ranked 6v6
Ranked guide
Fix one repeated miss
Practice Mode
Practice drills
Understand old 1v1 terms
Duels / 1v1 (historical — Update 59)
Update 59 history
Understand older competitive events
Tournaments / Challenger (historical — Update 64)
Update 64 history
Understand older modifier terms
Chaos Mode (historical — Updates 66/70)
Update history
2. Current Active Modes
Casual Matches — Best for learning controls, testing role fit, and building a stable input baseline before ranked.
Ranked 6v6 — The main competitive mode. The game is framed around fast 6v6 and ranked play. Before queueing, ensure someone owns first touch, second touch, attack, block, and cover.
Practice Mode — Useful when you can name one visible miss: net serve, low spike, panic dive, low set, early block, or camera drift. Update 73 added bots and hit indicators.
3. Historical / Archive Modes
Duels / 1v1 — Context found in Update 59 history. Not currently confirmed as live.
Tournaments / Challenger — Context found in Update 64. Community references describe Daily Tournaments and Challenger Tokens as past features.
Chaos Mode — Historical; referenced in Updates 66 and 70.
Ball Machines — Historical practice context in Update 62.
4. After-Match Mode Review
Match result
Meaning
Action
Touch-order chaos
Players stole touches or crowded lanes
Assign roles before next queue
Map readability broke rally
Camera or court depth felt wrong
Fix settings before changing build
Same mechanic failed twice
Miss repeated across map/teammate changes
Practice that specific touch
Reroll pressure after loss
One mode felt bad → want to spend spins
Compare fit, set a stop point first
10. LUCKY SPINS GUIDE
1. Types of Lucky Spins
Lucky Style Spins — Used for style rerolls. Better odds than normal spins. Apply toward style pity (Secret, Ultra, Evo).
Lucky Ability Spins — Used for ability rerolls. Secret Ability pity is randomized (not selected like style pity).
Do not mix style and ability spin counts in your notes.
2. How to Get Lucky Spins
Working codes (main source — see Section 1)
Season Pass rewards
Robux purchase
Official event rewards (verify current status via official Discord before claiming)
3. Lucky Spin Source Verification Order
Current working codes (copy exactly, Level 15 required)
Latest code checks (verify after source checks — do not publish reposted claims as working)
Update windows (check official Roblox/Discord before calling an event active)
Pity planning (check pity distance before spending near Secret/Ultra/Evo threshold)
Role fit (use combo and spin value tools before rerolling a playable slot)
4. Safe Spending Order
Check if current style or ability slot is actually the weak point.
Write down the repeated rally problem before opening any spin menu.
Check pity distance — if near a threshold, protect it.
Set a stop point (spin budget).
Roll only the pool that fixes the weakest slot.
After spending: test in 3 matches before spending again.
5. Do NOT Spend Yet If:
Event is unverified.
Target style/ability is not selected.
Current style or ability is already playable.
Account is below Level 15.
A code reward is missing from inventory (fix codes first).
6. What Not To Trust
Avoid any page asking for account credentials, browser cookies, Discord tokens, or two-factor codes in exchange for spins. No legitimate guide needs account access.
21. MAPS
1. Current Map Pool
Jungle Map (added Update 73) — Current in ranked rotation.
Outdoor deep-jungle and ancient-temple theme
Available in Ranked map voting
May affect: ball visibility, receive angles, camera comfort
Cyber Neon — Historical/archive map (no longer in active rotation as of current sources).
Ocean — Historical/archive (Update 70 context; Ocean_Update code was active at the time).
2. Jungle Map Ranked Tips
Visibility: Jungle environment can obscure ball tracking at certain angles. If receives or blocks are failing specifically on this map, adjust camera settings before changing build.
Map voting: Players can vote for their preferred map in ranked queue.
Touch order: The Jungle Map guide covers ranked voting, visibility adjustments, and touch-order considerations specific to the court layout.
Court comfort check: Run one casual match on the Jungle Map before a ranked session to calibrate ball-tracking comfort.
3. Map Readability vs Build
Map choice can affect readability before it affects account value:
If camera drift or court depth feel wrong → fix settings first
If ball tracking causes panic receives → mobile controls or camera sensitivity
If block timing breaks only on this map → practice block timing on the Jungle Map specifically
Only after map comfort is stable should you evaluate whether style/ability is the weak slot
4. Map Search Decision
Search phrase
Route
Jungle Map ranked
Jungle Map guide + maps hub + best settings
Map voting
Maps hub — don't assume private voting rules
Old Cyber Neon or Ocean terms
Update history (archive)
Court readability issue
Best settings + mobile controls + camera sensitivity
Spike serve — higher pressure; punishes weak receive; exposes bad power timing and rushed direction
Bump serve — control route; safer when second press is inconsistent or ball keeps hitting the net
Rule: use the serve you can land under pressure, not the one that looks strongest in a clip
Serve Pressure Ladder:
Rung
Pass signal
If it fails
Baseline power press
Start Serve and Power Selection without camera panic
Slow the second press; remove lane choice for one block
Net-clear consistency
Bump serve clears the net before adding spike serve
Use too-low fix + serve timer before adding spike serve
One lane pressure
Serve lands while targeting one repeatable lane
Aim straight; log misses; add one lane only after baseline returns
Ranked opener test
3 matches show whether opener survives scoreboard pressure
Review ranked readiness before spending
Serve Miss Matrix:
Miss pattern
Cause
Fix
Hits too low
Power press or jump timing rushed
Repeat Start Serve + Power Selection without changing aim
Clips the net
Second press inconsistent or route too aggressive
Bump serve reps until 3 serves clear the net
Goes out
Direction/tilt added before baseline was stable
Aim straight for one block; add one lane change after
Easy to read
Same aim and rhythm every point
Vary lane only after in-bounds rate is stable
Mobile mis-taps
Thumb path, camera drift, or HUD spacing
Separate camera space from serve button first
Serve Target Choices:
Target
Use when
Main risk
Straight baseline
Second press still becoming stable
Predictable after receiver settles
Deep corner
Baseline lands + opponents overstack middle
Out misses increase if direction added too early
Short reset
Opponent receives deep; team ready for short return
Easy first touch if serve is weak
Safe bump serve
Spike serve is missing; match needs clean rally starts
Too many safe serves give away pressure
Eight-Minute Drill: 2 min Start Serve only (no aim) → 2 min bump serve until consistent → 2 min add spike serve if second press is repeatable → 2 min review misses as low/net/out/readable.
3. HOW TO SPIKE
Core mechanic: Jump into a playable set, then press Bump/Spike (Left Click / RT) in midair. Hit when the ball is above the net.
Beginner rule: Neutral spike first → no tilt → land in bounds → then add tilt.
Spike Contact Checks:
Check
What to review
Fix
Low contact
Ball hit below net height or forward tilt pushes path down
Remove tilt; wait for above-net contact
Early jump
Jump starts before set reaches playable height
Delay jump; count only neutral spikes in bounds
Late contact
Reach after ball drops or camera pulls the touch late
Stabilize camera; ask for higher set
Blocked lane
Blocker reads same hit every swing
Keep rhythm; change final aim late with side tilt
Too Low Fix Matrix:
Miss pattern
Cause
Fix
Too low after forward tilt
Path pushed down before ball clears net
Remove forward tilt; wait for above-net contact; add direction later
Too low with no tilt
Jump before set reaches playable height
Ask for higher set; delay jump; count only clean neutral spikes
Blocked every time
Blocker reads same line before hit starts
Keep jump rhythm; change final aim late with side or safer deep hit
Spike goes out
Target too sharp or back tilt overused
Aim middle-third first; reopen sideline shots after 3 in-bounds contacts
Tilt Decision:
Tilt
Best use
Main risk
No tilt
First drill for beginners and too-low fixes
Predictable if repeated after defenders adjust
Forward tilt
Fast lower path when close to the net
Common too-low trigger when used too early
Side tilt
Lane change against a blocker sitting on the straight hit
Readable if same side every swing
Back tilt
Extra height or deeper safe ball when contact is low
Can float out if set is already high
Contact Timing Ladder:
Rung
Pass signal
If it fails
No-tilt contact
Ball above net; neutral hit lands in bounds
Remove forward tilt; slow jump; repeat clean reps
High contact with one lane
Spike goes to one planned target
Name the target before the jump; use slower set
Late tilt only
Tilt changes lane after timing is stable, not before
Return to neutral; compare style only after timing is readable
Ranked attack test
3 matches show same attack result vs real blockers
Move to ranked review, team rotation, or ability fit
Spike Location Three-Ball Check: Ball 1 — did set give enough height? Ball 2 — did contact happen above the net before tilt? Ball 3 — did location problem repeat with same lane or indicator cue? If 2 of 3 balls share the same miss, practice that mechanic. If miss changes every time, stabilize camera and settings first.
4. HOW TO RECEIVE
Core mechanic: Bump/Spike (Left Click / RT) on the ground for a controlled first touch. Dive (CTRL / X) only when ball is outside normal walking reach.
First Touch Decision Matrix:
Situation
First touch
Next move
Serve comes to your lane
Controlled bump
Aim toward setter lane, not straight back
Spike reachable with two steps
Move first, then receive
Stay up so second touch remains playable
Ball outside walking reach
Dive as rescue
Press CTRL/X only after path is clearly unreachable
Teammate has better angle
Leave or cover
Don't burn a random bump
Dive vs Stay-Up:
Choice
Best use
Main risk
Stay up
Serve receive, playable spikes, balls inside 2 normal steps
Standing still too long turns playable ball into late dive
Move + bump
Most ranked first-touch situations
Overpasses happen when player panics and hits too hard
Dive
Emergency saves when ball is outside walking reach
Dive spam leaves no stable pass target; steals teammate balls
Leave call
Teammate has better position or ball is not your lane
No call creates double touches or open court space
First Touch Ladder:
Rung
Pass signal
If it fails
Read before input
Know whether to take, leave, or cover before pressing
Slow first step; call lane before moving
Targeted bump
First touch points toward setter lane or safe reset
Name second-touch target before contact
Rescue dive only
Dive appears only when ball is outside normal reach
Run a short stay-up block before using more dives
Ranked receive test
3 matches: first-touch mistakes stop repeating
Review rotation, readiness, or ability fit
Receive Target Decision:
Target
Use when
Main risk
Setter lane
Teammate ready for second touch; ball can be controlled
Late or hard bump becomes an overpass
Safe middle reset
Team stretched; middle safer than forcing attack
Weak reset gives opponents time if nobody covers
Leave call
Teammate has cleaner angle or first-touch responsibility
No call creates double touches
Emergency dive
Ball outside normal walking reach
Dive spam steals teammate balls
5. HOW TO SET
Core mechanic: Set/Block (Q / LT) on the ground for a controlled set. Jump first, then Q/LT for a jump-set when extra height is needed.
Near-net rule: When the ball is tight to the net, pressing Q/LT while aimed at the opponent hands them an easy shot. Step off the net; aim sideways or backward instead.
Set Target Matrix:
Situation
Set target
Why
Ball tight to the net
Sideways or backward
Keeps set on your side; avoids handing opponent easy shot
Spiker ready outside
Outside lane
Gives hitter room to approach and aim around the block
Middle is open
Middle lane
Useful when opponent wall is late or split
No hitter ready
Safe reset
Better than setting empty space or forcing a dump
Set Height Decision:
Height
Best use
Main risk
Too low
Emergency continuation only
Spiker contacts below the net; loses angle
Playable
Most normal spiker support
Requires clear target call before hitter jumps
Very high
Slow reset when team needs time to recover
Blockers can read the lane before the spike
Dump look
Setter pressure after normal sets are respected
Predictable dumps waste second touch; expose open court
Second Touch Ladder:
Rung
Pass signal
If it fails
Stabilize first touch
Receive lands where setter can reach without sprinting
Fix the pass before blaming second touch
Call the target
Setter names outside, middle, back, or reset before Q/LT
Use role assignment so teammates know who hits next
Playable height
Hitter can jump into above-net contact without waiting
Adjust height before judging hitter ability or style
Setter pressure test
3 matches: normal sets, dumps, and cover calls survive
Review ranked route and ability fit before spending
Setter ability pairings: Minus Tempo (quick sets + tempo disruption), Zero Gravity Set (higher setup windows), Moonball (safe spacing + reset time).
When to chase Feiko: Only after normal target calls, height control, and first-touch quality are repeatable.
6. HOW TO BLOCK
Core mechanic: Set/Block (Q / LT) in midair after the hitter commits to their attack direction.
Key principle: Arrive before the hit, choose one lane, let teammates cover tips and deflections.
Block Timing Checks:
Check
Review
Fix
Early jump
Blocker jumps before hitter commits
Wait one beat after hitter rises, then press block
Late to net
Blocker still moving when attack starts
Start closer to net; arrive before reading swing lane
Wrong lane
Block slides across straight, angle, and middle with no lane call
Pick one lane; let backcourt cover around it
No cover
Deflection falls behind wall; no teammate shaded cover
Call cover before jumping; leave late blocks for a receiver
Lane Decision:
Lane call
Best use
Teammate cover
Straight
Hitter keeps aiming down the obvious line
Backcourt shades angle and short tip
Angle
Hitter beats straight blocks with side aim
Backcourt protects line and deep middle
Middle
Setter sends fast balls through center traffic
Teammates cover both sidelines after the touch
Leave / Cover
Late, low, or out of net position
Receive instead of turning late jump into open court
Block Timing Ladder:
Rung
Pass signal
If it fails
Arrive before jump
Reach blocking position before hitter starts attack
Start closer, move sooner, or leave ball for receive cover
Read hitter commitment
Jump after set and hitter path reveal a likely swing lane
Study hitter timing instead of mashing block
Seal one lane
Block removes straight, angle, or middle instead of drifting
Call one lane; let teammates cover around it
Ranked block test
3 matches: lane calls and cover survive ranked speed
If actions consistently come out "too low" (spikes, serves, sets):
Contact timing — pressing at the right moment in midair?
Set quality — is the set high enough and in the right position?
Jump timing — jumping before the set is playable? (too early = late contact)
Camera drift (mobile) — is camera movement causing contact at the wrong angle?
Tilt added too early — forward tilt before neutral contact is stable pushes the ball down
Never reroll style or ability before the neutral spike lands in bounds consistently.
8. Mechanic Priority Order
Fix in touch order — a bad receive makes sets look bad; a bad set makes spikes look bad:
Serve — does the rally start at all?
Receive — does first touch reach the setter?
Set — does second touch give the hitter a playable ball?
Spike — does the attack score or create pressure?
Block — does net defense remove one predictable lane?
Never reroll from one bad rally. Log 3 attempts, identify the repeated miss, practice that specific touch, then evaluate whether the slot needs a style or ability change.
12. PITY SYSTEM
1. Style Pity
The game tracks cumulative spins toward pity thresholds for rare style rarities:
Normal pity — reached after a certain number of spins without a rare pull
Secret pity — selected target; you choose the Secret style you're chasing
Ultra pity — similar structure for Ultra-tier styles
Evo pity — for Evolution-tier styles
Key rule: Check pity distance before spending a large spin stack. Spending near a pity threshold without checking it can waste the threshold.
2. Ability Pity
Secret Ability pity is randomized, not selected — you cannot choose which Secret Ability you receive at pity.
This is an important difference from style pity.
Do not treat Secret Ability pity as a guaranteed target chase.
3. Pity Tracker Usage
Use the Pity Tracker tool on the site to:
Record how many spins have been spent toward each pity type
Plan whether to continue spending or hold
Identify when to stop and wait for code rewards to refresh the stack
6. POSITIONS & PLAYSTYLES
1. Core Positions
Position
Main Job
Common Risk
Spiker
Finish playable sets without stealing every second touch
Tunnel vision on highlights breaks the Receiver → Setter → Spiker chain
Setter
Own the second touch, target lane, and hitter timing
Random sets make strong spikers look worse
Blocker
Take away one hitter lane and call cover behind you
Jumping early or camping net leaves open court
Receiver
Control first touch so the setter can choose the next play
Overpasses and panic dives turn defense into free balls
All-rounder
Test backup touches before locking a permanent role
Balanced answers can hide the actual skill needing practice
2. Key Rule: Position vs Style
A style or ability should support the job you can already repeat. If your style role doesn't match your recommended position, run the role picker, check inputs, then compare styles and abilities before spending spins.
3. Basic Rally Chain
Receiver → Setter → Spiker (with Blocker controlling one lane at the net)
Learn this chain before adding blocking, serving, or complex abilities.
4. Solo Queue vs Team Queue
Solo queue: Learn one main job + one backup touch. Flexibility is critical.
2v2: One player handles receive/set; one handles attack/block. Both keep emergency cover.
3v3: Name receiver, setter/all-rounder, and attacker/blocker before the first serve.
6v6: Split first touch, second touch, attack lanes, net defense, and cover so six players don't chase one ball.
5. Visible Rally Symptom Diagnosis
Repeated symptom
Likely role issue
Fix
First touch breaks
Team needs a receiver lane, not another attacker
Receive guide
No second touch
No setter route or setter is chasing first touch
Set guide + Team rotation
Attacks too low
Spiker is late, set is low, or lane not called
Too-low fix + Spike guide
Net defense open
No blocker owns one lane
Block guide + Team comps
Everyone chases
Roles are unnamed
Team rotation planner + Ranked guide
19. PRACTICE & DRILLS
1. Core Rule
Pick one visible miss, run one short drill block, then move to the exact mechanics or ranked page. Do not change style, ability, camera, and role all at the same time.
2. Practice Mode Features (Post-Update 73)
Practice bots — opponents you can hit against in a controlled environment
Hit indicators — visual feedback showing contact height and quality
3. Five-Minute Drill Ladder
Minute 1: Name the miss — serve net, low spike, panic dive, low set, early block, or camera drift.
Minutes 2–3: Run the matching route (see table below) without changing any variables.
Minutes 4–5: Repeat without changing camera, style, ability, or role at the same time.
One match: Test only that action. If the miss repeats, open the deeper mechanics page before spending spins.
4. Drill Search Route
Search phrase
First drill
Stop condition
General warmup
20-touch block + controls baseline
Stop when one repeated miss is named
Serve is unstable
Serve timer + serve guide
Stop adding aim until 5 straight serves clear the net
First touch breaks
Receive guide + touch order
Stop diving early if normal receive still reaches the ball
Spike too low
Too-low fix + spike guide
Stop judging ability value until contact height is stable
Sets leave hitters too low
Set guide + positions
Stop dumping/changing role until playable set repeats
Block timing off
Block guide + settings
Stop chasing every hitter until one block lane is sealed
Before ranked
Ranked guide + team comps
Stop queueing if warmup can't name all 5 roles
5. Mechanic Drill Ladder (Touch Order Priority)
Fix the earliest touch first — a bad receive makes sets look bad; a bad set makes spikes look bad.
Rung
Clean signal
If it fails
Serve control
Serve starts rally without net/out/panic aim
Use straight baseline serves before pressure serves
First touch
Receives become playable, not instant overpasses
Practice read-before-input; stop chasing every ball
Set height
Second touch gives hitter playable ball + clear target
Fix second-touch target before calling the spiker weak
Spike contact
Contact height and lane are readable
No-tilt contact first; check too-low before ability comparison
Block lane
Block jumps after hitter commits; cover is ready
Seal one lane instead of jumping at every fake
Team rotation
First touch, set, attack, block, cover jobs named before ranked
Assign touch order before queueing or rerolling
6. Miss-to-Drill Matrix
Visible miss
First drill
Escalate if it repeats
Serve hits net or floats out
Run 5 timed serves
Open serve guide
Spike says "too low"
Check contact height
Open spike guide
First touch becomes chaos
Run receive discipline
Assign touch order
Second touch is low or near net
Run set height drill
Recheck controls
Block jump is early
Wait for hitter lane
Stabilize camera
Bots expose the same mistake
Use Practice Bots
Leave only after repeatable contact
7. Session Types
Session
Use when
Drill
Five-minute reset
After a bad rally
Serve timer → too-low check or receive discipline
20-touch block
General consistency
5 serves + 5 receives + 5 sets + 5 attacks/blocks
Bot isolation
Bots repeat same miss
Practice Bots → block/spike timing after clean contact
Mobile controls → 1 settings change → retest contact
Post-reroll evidence
New style or ability
Style comparison → 3-match test → combo planning
8. Three-Rally Evidence Log
Evidence pattern
Meaning
Action
Same miss in 3 short rallies
Mechanic is specific enough to drill
Run the exact route for that miss
Miss changes every rally
Controls, camera, or role stability needed first
Use 20-touch block before judging any single mechanic
Mechanic clean but pressure weak
Style or ability slot may matter now
Practice-first build check before spending
Clip/Discord claim started the drill
External evidence may not match your role/patch
Separate source checking from personal drill results
9. After Practice Route
Result
Action
Miss improved
Keep the build; test in short ranked/casual block
Miss still repeats
Open the exact serve/receive/set/spike/block guide
Practice-first build check passed
Compare weak slot, check spin value and pity before spending
Claim doesn't match practice
Don't rewrite build plan until source and match evidence agree
20. RANKED GUIDE
1. Ranked Readiness Matrix
Signal
Risk
Action
Below Level 15
Rewards and match reps still unfinished
Use Level 15 planner + controls + codes after the gate
Basic controls only
Ranked mistakes look like bad teammates
Practice receive, serve, set, dive discipline
No locked role
Solo queue gets messy when everyone chases every touch
Pick one role; communicate through positioning
Unknown combo fit
Strong style can still fail without matching ability
Pair style and ability around attack/support/defense/mobility
High tilt risk
Long losing blocks waste spins and practice time
Stop after 2 frustrating losses; run a short drill
2. Before Queue Checklist
Check
Pass signal
If it fails
Control baseline
Serve, receive, set, spike, block, dive are repeatable under pressure
Serve timer or one mechanic drill first
Role lock
You can say whether your job is receive/set/spike/block/cover
Use role picker + positions guide
Combo check
Style and ability solve the same rally problem
Compare slots before spending more spins
Map comfort
Camera, court readability, and ball tracking are comfortable
Fix settings before changing build
Reward/pity risk
Code rewards and Lucky Spins have a clear spend-or-hold rule
Hold spins until weak slot and pity risk are clear
3. Ranked Session Decisions
Session state
Action
Route
Queue-ready
Play short ranked block; stop while decisions are still readable
Team comps + team rotation
Warmup needed
Run one short mechanics route before queueing
Practice drills + serve timer
Stop-loss
End ranked block; name one miss; move to practice
Too-low fix + receive guide
Map pressure
Separate map readability from role/build value
Maps hub + Jungle Map + best settings
Team chaos
Assign first touch, set, attack, block, cover before another queue
Team rotation + positions + role picker
Reward-reroll risk
Check combo fit and 3-match evidence before spending
Codes + spin calculator + combo builder
4. Solo Queue Rule
Before queueing solo, name your job: receive, set, spike, block, or cover. If you can't name it before the serve, use the role picker first. Solo queue needs one clear main job + one backup touch.
5. Ranked Search Route
Search phrase
Open first
Stop condition
Solo queue ranked
Role picker + team rotation + controls
Stop if can't name all 5 touch jobs before serve
6v6 ranked team chaos
Best team comps + team rotation + set guide
Stop before another queue if touch order not assigned
Stop spending if style/ability not tested for 3 readable matches
Jungle Map ranked
Jungle Map guide + maps hub + best settings
Stop blaming build until map visibility checked
Stop-loss after 2 losses
Practice drills + spike/block guide + source policy
Stop ranked; practice one named miss
6. Ranked Session Length
Two clean wins can be enough for one session.
Two frustrating losses = clear stop signal. Move to practice, not another queue.
After a stop, run a serve timer or receive drill before spending any spins.
7. After Ranked Block Route
Route
Use when
Action
Queue again
Wins/losses were readable; roles stayed clear
Queue one more short block with same plan
Warm up only
Serve, receive, set, or block drifted under pressure
Run one warmup block; return only if miss becomes stable
Stop and practice
Two losses triggered panic touches or rushed reroll
Name most visible miss; practice that mechanic away from ranked
Review build (3 matches)
Same style/ability issue across 3 readable matches
Compare weak slot; keep source-dated notes separate from opinion
8. What Ranked Does NOT Tell You
This guide does not know: hidden matchmaking ELO, teammate quality, rank gain/derank risk, or private vote rules. All advice is based on visible preparation signals you can control.
16. SECRET & LIMITED STYLES
1. Secret Styles (Permanent Pool)
Secret styles have very low drop rates from normal spins but can be targeted via pity:
Sanu / Sanju — Secret Spiker. High-demand style. The name "Sanu" in search maps to the current in-game "Sanju" naming. Secret Spiker role with tilt-based attack.
Feiko — Secret Setter. Can switch between support sets and dump threats. Availability is limited and returns in windows; verify current status.
2. Secret Ability (Limited)
Lead Feet — Only Secret Ability. Limited; launched Update 56, returned Update 69. Availability requires a fresh source check.
3. Limited Styles
Limited styles are available only during specific event windows. Key rules:
Do NOT spend Lucky Style Spins on limited styles based on old clips or outdated availability lists.
Verify via official Discord or the Limited Styles guide before chasing.
When a window ends, the style goes to the limited archive.
Known limited style example:
Kumo — Secret Libero/Setter style. Released June 13, 2026; limited until June 27, 2026. Normal Style Spin chance: 0.01%; Lucky Spin chance: 0.5%. Window is now ended.
4. Spin Odds Context (General Reference)
Style rarities include: Common, Rare, Epic, Ultra, Secret, Evo
Normal spin odds decrease at higher rarities
Lucky Spins have improved odds at higher rarities
Pity ensures a guaranteed rare pull after a set number of spins
23. SECRET STYLES
1. What Are Secret Styles?
Secret styles are the highest-rarity style tier in Volleyball Legends. They have very low drop rates from normal spins but can be targeted through the pity system. Key current Secret styles:
Style
Role
Status
Normal odds
Lucky odds
Sanju (Sanu)
Secret Spiker
Permanent
0.01%
0.5%
Feiko
Secret Setter
Limited (window ended June 6, 2026)
0.01%
0.5%
Kumo
Secret Libero/Setter
Limited (window ended June 27, 2026)
0.01%
0.5%
2. Target Lock Checklist (Before Spending)
Name the target — Sanju, Feiko, or another exact Secret style. Don't chase "Secret rarity" alone.
Name the role — Does the target match the job you actually play?
Check the window — Is the style currently available? Verify via official Discord for limited styles.
Check the counter — Use the Pity Tracker; keep Lucky Style pity separate from ability pity.
Prepare the team route — Will the new style change a lane assignment or just the inventory label?
3. Secret Style Search Routes
Search phrase
Likely intent
Action
Sanu / Sanju spike intent
Secret Spiker for tilt pressure
Sanu guide + spike timing
Feiko setter intent
Secret Setter for dump pressure
Feiko guide + set guide + verify availability
Not sure of target
Wants Secret label without role/target
Role picker + style comparison first
Limited or returning Secret
Needs availability context
Limited styles guide + next update watch
Code reward into Secret chase
Just redeemed spins
Spin value calculator + pity tracker
4. When to HOLD (Do Not Spend Yet)
Target is not selected in-game
Event state is unverified or watch-only
Feiko/Kumo availability window has not been confirmed as reopened
Current style already fits your role
Code reward has not appeared in inventory yet
5. Post-Pull Route
Result
Action
Got Sanju
Test spike timing, tilt pressure, attack lane discipline before declaring it solved
Got Feiko
Test setter deception, dump timing, second-touch decisions before ranked
Got another playable style
Compare role fit before rerolling a rare but useful slot
No target yet
Stop chase; choose role path before spending next stack
Reward missing
Don't change pity notes until the reward path is resolved
6. Secret Style Pity (Important Distinction)
Style pity = selected target — you choose which Secret style you're chasing
Ability pity = randomized — you cannot choose which Secret Ability you receive at pity
These are two completely different systems; never confuse them when planning a chase
17. SPECIFIC STYLE GUIDES
1. Sanu / Sanju Guide
Name note: "Sanu" is the previous public name; "Sanju" is the current in-game wiki name (Fandom revision 6656, timestamp 2026-06-01). Both refer to the same style. Treat all "Sanu" searches as pointing to Sanju.
Facts (source: Fandom Sanju revision 6656, June 2026):
Parameter
Value
Current name
Sanju
Previous name
Sanu
Role
Secret Spiker
Rarity
Secret
Status
Permanent
Normal Style Spin chance
0.01%
Lucky Spin chance
0.5%
Signature mechanic
Direction-changing spike tilt
Balance note
Left/right tilt nerfed by 15% on May 10, 2025
What Sanju does: Changes spike direction by a few degrees when tilting. Used for attack-angle pressure against blockers who read the same lane repeatedly.
Tilt mechanics:
Practice neutral contact first — land the spike above the net without any tilt.
Only add left or right tilt after the blocker commits to a lane.
If hits go too low, fix jump timing and contact height before judging the tilt.
Tilt fact boundary: the wiki records "a few degrees" of direction change; no hidden angle math is confirmed.
Tilt drill:
Run 10 spikes with no tilt from a playable set; count only in-bounds contacts.
Add left or right tilt only after 3 neutral spikes clear the net in a row.
If still too low, fix jump timing and camera angle before spending more spins.
When to keep Sanu/Sanju:
You can time jump contact and use tilt without sending easy balls out.
Three-match evidence is positive.
You are at or near a pity target.
When to reroll:
Your team needs a stable receiver, setter, or low-risk first touch more than another attacker.
Points keep being lost before the ball ever reaches your attack lane (serve/receive problem).
Best ability pairing: Curve Spike or Shield Breaker
Matchup ladder:
Comparison
When to choose Sanu/Sanju
When to choose the other
Sanu vs Kijo
Attack pressure with simpler tilt reads
Kijo: high-skill charged Super Tilt angles
Sanu vs Mikage
Point-ending spikes
Mikage: defensive coverage and rally extension
Sanu vs Kazana
Tilt control is repeatable
Kazana: simpler attack reads for beginners
Sanu vs Feiko
Front-row finishing
Feiko: second-touch control and dump pressure
How to get Sanju:
Check current codes for free Lucky Style Spins.
Confirm Sanju is in the current style pool (it's permanent, so it should be).
Use the Pity Tracker before spending a large stack.
Do NOT chase from a small stack without checking pity and role fit.
⚠ Availability warning: The June 6, 2026 window has ended. Treat Feiko as unavailable until an official Discord post or fresh in-game source confirms a new rerun. Do NOT spend Lucky Style Spins on Feiko based on old clips or reposted availability lists.
What Feiko does: Secret Setter that can switch between a normal jump set and a short dump shot aimed at open court space. Value depends on making the normal set and the dump look identical until the defender commits.
Dump Set mechanic:
Use the same approach and jump motion for both normal sets and dump shots.
Dump only after the receiver or blocker commits away from the short lane.
Value drops if the dump timing is telegraphed or teammates never convert the normal set.
Feiko drill route:
Drill
Goal
Set disguise repeats
Use the same approach for normal jump set and dump set
Short-court read
Dump only after receiver/blocker commits away from short lane
Three-set check
Record 3 setter possessions: was first touch playable? Did dump/set look similar? Did team convert?
When to keep Feiko:
You already own it from a previous window.
You can alternate normal sets and dump threats without telegraphing.
Your team converts the attack after your sets.
When Feiko is NOT the solution:
Points lost from receive, serve, or simple attack timing before a set is available.
You want simple spiker pressure instead of setter deception.
Best ability pairing: Zero Gravity Set or Minus Tempo
Matchup ladder:
Comparison
Feiko
The other
Feiko vs Kijo
Setter deception and dump pressure
Kijo: spiker tilt and charged Super Tilt attacks
Feiko vs Taichou
Aggressive short-court reads
Taichou: safer support when team needs stable setup first
Feiko vs The Twins
Focused second-touch pressure
The Twins: all-rounder coverage and flexibility
Feiko vs Sanu
Setup and rally creation
Sanu: front-row attack finishing
3. Ibara Guide
Context: Update 73 added charge-rate buffs to Ibara. This changed its viability relative to older tier data.
Rule: Always check the Update 73 Ibara route before treating older Ibara tier data as current. The buff specifically affects how fast Ibara charges its signature mechanic.
Practical check: If you owned Ibara before Update 73 and it felt weak, test it again post-buff before spending Lucky Style Spins to reroll it.
4. Style Stats Reference (from Fandom — use as role context, not hidden meta proof)
Style
Notable Public Stats
Role
Feiko
Set 100% / Jump 100% / Speed 85%
Secret Setter
Sanju (Sanu)
Tilt mechanic; 15% nerf to left/right tilt (May 10, 2025)
Secret Spiker
Kumo
Released June 13, 2026; limited until June 27, 2026; 0.01% normal / 0.5% Lucky
Secret Libero/Setter
Warning: Published stat percentages reflect public Fandom snapshots. Do not use them as hidden win-rate data or guaranteed ranked performance predictions.
15. STYLE-ABILITY COMBOS
1. Overview
Pair your style with an ability that supports the same rally plan for your role. A spiker style paired with a defender ability wastes one slot; a setter style paired with a finisher ability wastes the other.
2. Recommended Pairings by Role
Role
Style Candidates
Ability Candidates
Spiker
Sanu, Kazana, Jinko, Kijo
Shield Breaker, Divine Strength, Curve Spike
Setter
Feiko, Taichou
Minus Tempo, Zero Gravity Set, Moonball
Receiver
Mikage, The Twins
Magnetic Pull, Extra Touch, Rolling Thunder
Blocker
Mikage, Encho
Steel Block, Magnetic Pull, Boom Jump
All-rounder
Hidari, Feiko, Yogan
Extra Touch, Magnetic Pull, Boom Jump
3. Style-Ability Matrix
The full style-ability matrix on the site cross-references every style with every ability for specific role and weakness matchups. Use the Combo Builder tool to:
Enter your current style and ability
Identify role gaps the combo creates
Find which opponents the combo handles vs. which it struggles against
13. STYLE KEEP / REROLL GUIDE
1. Three-Match Evidence Rule
Never reroll from one bad match. Play 3 short matches and write down the repeated issue before making any spin decision. If the same issue appears in at least 2 matches, route the fix to the slot that caused it.
2. When to Keep a Style
Role fit is stable (style supports your actual match job)
Spin stack is small
Pity counter is close to a threshold
Style fixes a repeated mistake
Newest tier claim has no dated source
3. When to Reroll a Style
The style role doesn't match what your team actually needs
Three-match evidence clearly shows the style is the weak slot
You have enough Lucky Style Spins + a clear target
Pity is far from threshold (no risk of wasting pity)
4. Stop-Loss Principles
Before rolling, note what visible rally problem you're trying to fix.
Set a maximum spin count for this session.
Stop after reaching that count regardless of result.
Retest in 3 matches before rolling again.
5. Style Source Rule
A tier list should not be the only reason to reroll. Wait for: official patch context + public guide agreement + 3-match player evidence showing the slot is the real problem.
8. STYLES TIER LIST
Last checked: June 29, 2026. Source: independent editorial + Fandom styles reference (revision 7553) — 41 total styles, 23 permanent, 18 limited.
1. Tier S — High-Impact Ranked Picks
Prioritize styles that directly change point pressure, blocking windows, or spike placement.
Style
Role
Keep If
Reroll If
Paired Ability
Sanu (also: Sanju)
Spiker
You can time jump contact and use tilt without sending balls out
Your team needs stable receiver/setter more than another attacker
Curve Spike or Shield Breaker
Encho
All-rounder
You position early and want a style that rewards front-row timing
You need raw speed or a simpler solo queue role
Magnetic Pull or Extra Touch
Kazana
Spiker / Server
You want a strong style that can score before mastering all advanced tilts
You're losing points before the set reaches you
Divine Strength or Curve Spike
Jinko
Spiker / Server
You like directional serves, sharp attack angles, and baiting blockers
You prefer predictable contact timing over curve-heavy reads
Curve Spike or Minus Tempo
Mikage
Blocker / Receiver
You enjoy stopping attacks and restarting messy rallies
Your team already has defense but lacks a reliable point closer
Steel Block or Magnetic Pull
2. Tier A — Strong Role Specialists
Excellent when the team already knows who sets, who receives, and who closes the point.
Style
Role
Keep If
Reroll If
Paired Ability
The Twins
All-rounder
You understand multiple roles and want a kit that adapts between rallies
You're still learning basic serve, receive, set timing
Extra Touch or Boom Jump
Feiko
Setter
You can switch between support sets and dump threats without making the read obvious
You want a simple spiker route or team needs safer receiving
Zero Gravity Set or Minus Tempo
Kijo
Spiker
You can wait for clean sets, charge tilt deliberately, and aim side angles
You need safer receiving, blocking, or simpler setter route
Curve Spike or Minus Tempo
Taichou
Setter
You want a stable setup style for ranked practice
You need mobility or emergency defense first
Extra Touch or Minus Tempo
Yogan
All-rounder
You switch between roles and want fewer dead matches from team composition
You already know you only want spiker or blocker practice
Magnetic Pull or Boom Jump
Hidari
Spiker / Server
You can combine serve reads with fast point pressure
You need a forgiving beginner style for receiving first
Curve Spike or Super Sprint
3. Tier B — Reliable Ladder Choices
Playable and useful, but more dependent on role fit or player timing.
Kyamo · Bakuri · Hirakumi · Okazu · Kisuki
4. Key Principle: Role Fit Beats Raw Hype
Do not reroll a rare style just because a tier label moved. A dedicated setter, blocker, or receiver often wins more ranked games than a high-hype spiker on an account that already has enough attack pressure.
5. Style Tier Search Decision Matrix
Search intent
First answer
Stop condition
Best style overall
Check role fit before copying the top label
Stop if current style already supports your main role
Sanu / Sanju style
Treat as spiker-pressure watch, not automatic reroll target
Stop after 3 matches if problem is timing, not style
New codes gave style spins
Separate Lucky Style Spins from Lucky Ability Spins
Stop when next spin doesn't change the role problem
Style feels bad after one match
Collect 3-match evidence before blaming the pull
Stop if same mechanic fails across different styles
Patch changed style tiers
Hold until source check separates update notes from reposts
Stop if claim has no dated source
22. TEAM COMPS
1. Core Principle: Role Chain Before Style Chain
Build the team around touch order first. Receiver → Setter → Spiker, then add Blocker and cover. Only after roles are clear should you ask which styles (Sanu, Feiko, Mikage, Kijo, etc.) and abilities support each job.
One player per touch type; all three name a main job before serve
2v2
1 Receiver/Setter hybrid, 1 Spiker/Blocker hybrid
Each player needs main job + backup touch; no spare cover lane
Solo queue
One clear main job + one backup touch
Cannot control teammates; start from what you can repeat
3. Comp Diagnosis by Rally Symptom
Repeated symptom
Likely comp gap
First adjustment
Serve receive collapses before a set
No named first-touch owner
Assign one receiver; one backup cover call
Good receives become weak attacks
Second touch rushed or taken by wrong player
Give one setter/all-rounder the second ball
Spikes hit low or into blocks
Hitter from poor set height or late approach
Call target lane; test high-contact reps
Every rally ends at the net
No blocker lane assigned or blocker jumps too early
Name one lane to remove + one teammate for tip cover
Two strong attackers still lose
Pressure without a stabilizer for first touch
Move one attacker into receiver/cover duty
4. Style & Ability Fit by Comp Role
Comp job
Style route
Ability route
Don't reroll until
First-touch stabilizer
Mikage or all-rounder routes
Extra Touch, Magnetic Pull, or movement support
You can receive 3 serves without panic diving
Second-touch tempo
Feiko, Taichou, or The Twins
Minus Tempo, Zero Gravity Set, or setup utility
Normal set direction is repeatable
Point-ending attack
Sanu, Kijo, Kazana, Hidari
Shield Breaker, Divine Strength, or Curve Spike
Team can create a clean set before the spike
Net denial and cover
Ibara, Mikage, or blocker routes
Steel Block, Boom Jump, or Lead Feet
You know which lane the blocker removes
5. Queue Playbooks
Queue
Before serve
First adjustment after mistakes
2v2
Split receive/set and attack/block; both keep a backup touch
If both chase first touch, lock one receiver for 3 rallies
3v3
Each player names one main job before the first serve
If setter disappears, move all-rounder to second touch
6v6
Split left/right receive lanes, name attacker lanes, one blocker covers net
If crowded, split receive lanes before rerolling anyone
Solo
Pick one repeatable main job + one backup
Patch the most visible missing role
6. Comp Check Drill
Before serve: call first touch, second touch, attack lane, and cover lane.
After one rally: name whether the miss was receive, set, spike, block, cover, or communication.
After five rallies: move one player or job — not the entire comp.
After one match: decide whether the weakness needs practice, team rotation, or style/ability routing.
11. YEN & ECONOMY
1. Yen Basics
Yen is the main in-game currency for style spins and ability spins. Sources:
Match Yen — earned by playing matches (amount varies; measure your own reward from one real match before planning)
Premium Yen bonus — official +10% boost from Roblox Premium
Codes — can give free Lucky Spins, reducing how much Yen you need to farm
Daily Tasks — additional Yen from completing daily objectives
2. Spin Costs (June 2, 2026 public wiki snapshot)
Spin Type
Cost
Style Spin
100 Yen
Ability Spin
250 Yen
50 Style Spins (normal pity check)
5,000 Yen
50 Ability Spins (large target)
12,500 Yen
Recheck costs after major updates before grinding a large stack.
3. Yen Source Hierarchy
Source
Action
Caution
Observed match Yen
Enter your own post-match reward into a planner
No guide should invent a universal Yen-per-match number
Roblox Premium (+10%)
Apply to your observed reward
Only changes the estimate, not the need to measure first
Codes
Redeem after Level 15; route free spins first
Codes expire after updates
Pity targets
Plan only after target is worth chasing
Not a live pity counter
4. Yen Planning by Player State
Player state
Best first action
Below Level 15
Play matches and follow the Level route before judging code value
First style pity check
Save for a measured style spin block; style spins are cheaper than ability spins
Ability spin plan
Confirm ability is the weak slot before converting a full Yen session into rolls
Premium session
Measure a baseline match reward, then apply the +10%
After code rewards
Redeem codes first, then update the plan with remaining gap
5. Session Budget Ladder
Five-match baseline — Record starting Yen, ending Yen, and whether Premium is active.
Daily goal — Play only as many matches as you can without rushing mechanics.
Pity gap — Count how many normal spins remain before the pity threshold.
Premium check — Compare with and without the +10% before committing to a grind.
6. Spend Order
Reach Level 15 so free code rewards are available before paid rerolls.
Redeem current codes and separate Lucky Style Spins from Lucky Ability Spins.
Use the Spin Value Calculator to choose whether style or ability is the weak slot.
Use pity tracking only after the target is actually worth chasing.
Return to Yen farming only when you know which slot needs more normal spins.
7. When to STOP Farming
Stop Yen farming when:
Codes can cover the gap (check before grinding another session).
Mechanics are the blocker (practice is worth more than a new spin).
The target is no longer relevant after an update.
The Yen target is reachable within a clear session count.
8. Daily Tasks
DAILY_TASKS was a historical code tied to daily progression (no longer active as a redeemable code).
Daily tasks provide regular progression Yen and are linked to Level 15 milestones.
Task rerolls are available to change undesirable objectives.
📄 Description
BECOME THE KING OF THE COURT in Volleyball Legends!!
🏐🔥🔥FAST-PACED 6v6 Volleyball
Play a pickup Volleyball game with friends OR challenge anyone in a RANKED match
🎮CONTROLS:
Bump, Spike in Midair - CLICK [PC], RT [CONSOLE]
Set, Block in Midair - Q [PC], LT [CONSOLE]
Dive - CTRL [PC], X [CONSOLE]
❓HOW TO SERVE:
Once it is your turn to serve, click on screen (RT on console). Click again to choose power.
You can jump and spike the ball (tilt to change direction of the ball).
You can also let the ball drop to bump serve the ball in.
Premium benefits: Premium players receive +10% Yen
New updates weekly Saturdays at 11:30am EST!
Follow the game so you don't miss out!
💛LIKE, FAVORITE, and JOIN the group for REWARDS!
There are currently 21 active Volleyball Legends codes, last checked September 3, 2026.
✓ Codes checked September 3, 2026
CodeRewardDateCopy
BLOCKED
5 Lucky Ability Spin29/08/2026
SHIRO
5 Lucky Style Spin29/08/2026
UPDATE_85
5 Lucky Style Spin29/08/2026
PIRATE_SZN
5 Lucky Ability Spin22/08/2026
SEASON_18
5 Lucky Style Spin22/08/2026
UPDATE_84
5 Lucky Style Spin22/08/2026
SCHOOL_SOON
5 Lucky Ability Spins16/08/2026
MIKAGE_REVIVED
5 Lucky Style Spins16/08/2026
UPDATE_83
5 Lucky Style Spins16/08/2026
JETPACK
5 Lucky Ability Spin08/08/2026
ROKETTO
5 Lucky Style Spin08/08/2026
UPDATE_82
5 Lucky Style Spin08/08/2026
ENCHO_NERF
5 Lucky Ability Spins07/08/2026
HIDARI_FINALLY
5 Lucky Style Spins07/08/2026
UPDATE_80
5 Lucky Style Spins07/08/2026
KNEE_SLIDE
5 Lucky Ability Spins07/08/2026
LEAD_FEET_AGAIN
5 Lucky Style Spins07/08/2026
UPDATE_81
5 Lucky Style Spins07/08/2026
FESTIVAL_UPD
5 Lucky Ability Spins27/07/2026
SEASON_17
5 Lucky Style Spins27/07/2026
UPDATE_79
5 Lucky Style Spins27/07/2026
Know a code we missed?
1Launch [UPD] Volleyball Legends on Roblox and join any server
2Look for the Twitter bird or gift box icon on the side of the screen
3Click it to open the code redemption menu
4Type or paste your code exactly as shown above
5Press Redeem — your reward appears instantly
CodeRewardDate
BACK_TILT
-07/08/2026
FREE CLAIM
5 Lucky Style Spins07/08/2026
UPDATE_77
5 Lucky Style Spins27/07/2026
RIKU
5 Lucky Style Spins27/07/2026
HOLO_WALLS
5 Lucky Ability Spins27/07/2026
UPDATE_78
5 Lucky Style Spins27/07/2026
LEADERBOARD
5 Lucky Style Spins27/07/2026
NEW_PACK
5 Lucky Ability Spins27/07/2026
NEW STYLE - SHIRO
SHIRO is the latest style being added to Volleyball Legends. From his years of experience on the court, he's developed an INSANE block receive. Remember the days of prime jumpset blocking?? Unc still got it 😁
Shiro can switch between two blocking modes, similar to Feiko. SLAM - MAX Block BOOST - Insane spike power + gravity boost on the next spike. If the ball is not spiked on the next touch, the ball will still have a small spike buff (different than Taichou).
2x Lucky Event
ANOTHER 2X Luck event incoming so y'all can get the styles & abilities you want
FROM Aug 29th, 2026 11:30 AM ET to Aug 31st 2026 11:30 AM ET
SECRET PITY IS HALVED: 200 -> 100 SECRET STYLE/ABILITY CHANCES ARE DOUBLED: 0.5% -> 1%
Hurry, this event only lasts 48 hours!
LUCKY STYLE/ABILITY SPIN HANDOUT
LUCKY STYLE/ABILITY SPINS ARE BEING HANDED OUT from Aug 29th, 2026 10:30 AM ET to Aug 29th, 2026 12:30 AM ET Every 10 mins!!! 12 lucky spins total... ❤️
These can extend rallies, break defensive reads, or create immediate attacking pressure.
Ability
Best For
Keep If
Reroll If
Paired Style
Magnetic Pull
Blocker / Receiver
You stay near the ball and can time the magnetic radius around receive, block, or net play
You want a simple instant finisher and rarely read next-touch position
Mikage, Encho, or Yogan
Extra Touch
Receiver / All-rounder
Your team loses points from messy first touches and you can turn extra time into a clean set
Your rallies already reach a clean spike but lack a point-ending tool
The Twins, Taichou, or Encho
Minus Tempo
Setter / Spiker
You can coordinate quick sets or attack timing instead of waiting for obvious high balls
You solo queue with teammates who never read tempo changes
Kijo, Taichou, or Jinko
Shield Breaker
Spiker
Your chosen role is closing rallies and you can hide activation until the spike matters
You're losing points before the ball ever reaches your attack lane
Sanu, Kazana, or Hidari
Divine Strength
Spiker / Server
You already get playable sets and need more force behind spikes or serves
Your issue is positioning, ball control, or teammate setup
Kazana, Jinko, or Sanu
2. Tier Secret — Limited Secret Ability
Ability
Notes
Lead Feet
Limited Secret ability. Launched Update 56, returned Update 69. Availability ended — requires fresh source check before any chase. Multi-use charge pressure; best for Spiker/Blocker. Paired with: Sanu, Jinko, Kazana.
3. Tier A — Strong but Timing-Heavy
Good in ranked when the user understands spacing, set height, and block timing.
Ability
Best For
Notes
Curve Spike
Spiker / Server
Curved attack lanes; value drops if you can't control direction
Zero Gravity Set
Setter
Higher setup windows; only as useful as the teammate who attacks it
Moonball
Setter / All-rounder
Safer rally control; slow balls can become free balls against organized defenders
Boom Jump
Blocker / Spiker
Vertical pressure for high contact; jump height doesn't replace early reads
4. Tier B — Situational Utility
Useful for specific roles, less consistent as a main win condition.
Ability
Best For
Notes
Redirection Jump
Receiver / All-rounder
Situational recovery for broken rallies
Super Sprint
Receiver
Mobility for late arrivals; can cause out-of-position play
Steel Block
Blocker
Front-line denial; value falls when attackers mix timing and direction
Rolling Thunder
Receiver
Defensive recovery; needs strong follow-up set and spike
5. Ability Decision by Rally Problem
Repeated rally problem
Start with
Decision
First touch keeps breaking
Magnetic Pull, Extra Touch, or Rolling Thunder
Keep if ability extends rallies; practice receive if ball is missed before ability activates
Clean spikes need pressure
Shield Breaker, Divine Strength, or Curve Spike
Reroll only if account already gets clean sets but still can't finish points
Second touch feels rushed
Minus Tempo, Moonball, or Zero Gravity Set
Choose tempo control before chasing a finisher
Net timing loses points
Steel Block, Boom Jump, Lead Feet, or Magnetic Pull
Separate ability value from late jumps, camera mistakes, or wrong-lane blocks
Near Secret Ability pity
Current playable ability + saved Lucky Ability Spins
Secret Ability pity is randomized — don't treat it as a chosen target guarantee
6. Beginner Ability Rule
If you cannot reliably receive, set, and block yet, choose forgiving utility (Extra Touch, Magnetic Pull) before chasing a flashy finisher. Consistency makes free code spins more valuable.
14. ABILITY KEEP / REROLL GUIDE
1. Ability Keep-or-Reroll Checklist
Problem
Keep if you own
Reroll only if
First-touch safety
Extra Touch, Magnetic Pull, or Rolling Thunder
Rally still dies on receive after 3 matches and ability never affects second touch
Attack finish
Shield Breaker, Divine Strength, or Curve Spike (if sets are already clean)
You rarely get clean spike chances (issue is set timing or role fit)
Setter tempo
Minus Tempo, Zero Gravity Set, or Moonball
Team has no assigned setter or you're using a finisher to solve a tempo problem
Block / net
Steel Block, Boom Jump, Lead Feet, or Magnetic Pull
Blocks are late because of camera, jump timing, or wrong lane — not ability value
Mixed movement
Super Sprint, Redirection Jump, or Magnetic Pull
Movement tool creates chaos because player hasn't locked a role
2. Ability Reroll Stop-Loss
Same 3-match rule applies. After receiving Lucky Ability Spins, note the repeated rally problem, check pity, and set a stop-spin count before rolling.
4. BEGINNER GUIDE
1. First 20 Minutes Route
Time
Goal
Action
0–5 min
Learn inputs
Practice serve, receive, set, spike, block, and dive slowly before blaming styles
5–10 min
Name misses
Label each miss (receive, set, spike, block, positioning) — do not reroll yet
10–15 min
Level 15 gate
Use early casual matches to reach Level 15 before judging code box failures
15–20 min
Route rewards
After redeeming codes, separate Lucky Style Spins from Lucky Ability Spins before spending
After 20 min
Pick a role
Choose one starter role for ranked practice instead of switching every match
2. First Day Progression Route
Stage
Goal
Action
First login
Learn the input chain
Serve, receive, set, spike, block, dive until each miss has a name
Before Level 15
Make codes useful later
Play casual matches; avoid judging code failures before Level 15
After codes
Route rewards safely
Separate Style Spins from Ability Spins; choose the weaker slot before rolling
First role
Stop chasing every touch
Pick one role for one practice block
Before ranked
Avoid tilt queueing
Confirm touch order, one reliable serve, and one role job first
3. Safe Reward Spending Order
Confirm Level 15 and redeem current codes.
Name the weak slot — if rallies fail before style/ability matters, practice first.
Choose style or ability deliberately: style spins fix role fit; ability spins fix a rally-support gap.
Check pity and set a stop point.
Retest in 3 matches — keep the build if it improves the same visible problem at least twice.
4. Common Beginner Mistakes
Mistake
Fix
Route
Serve goes out or hits too low
Focus on second-press timing
Serve timer
You chase every ball
Pick a role and let teammates have their touches
Role picker
Redeemed codes but can't choose a pool
Compare current style vs ability fit before rolling
Spin calculator
Don't know the input chain
Review PC/console controls first
Controls guide
5. Choose a Starter Role
Receiver — if your team keeps losing first touch
Setter — if attacks never become playable
Spiker — if you can time jumps and want scoring pressure
Blocker — if you enjoy reading hitters at the net
All-rounder — if you're still learning where you belong
5. CONTROLS
1. Official Control Map (PC & Console)
Action
PC
Console
Use it for
Bump / Spike
Left Click
RT
Ground first touch, or midair spike
Set / Block
Q
LT
Controlled set on the ground, or block midair
Dive
CTRL
X
Emergency reach for balls you can't cover on foot
Serve Start
Left Click
RT
Start serve when the game gives you the ball
Serve Power
Left Click
RT
Press again to choose power (spike serve or bump serve)
2. Serving Rhythm
Start the serve (Left Click / RT).
Press again to choose power (Left Click / RT).
Decide: jump and spike serve, or let the ball drop into a safe bump serve.
Add directional tilt only after power timing is repeatable.
7–11 min: Practice first touch. Late footwork → receive guide; panic dive → mobile controls or settings.
11–15 min: Choose one role for the next match.
7. GAME MODES
1. Mode Overview
Player Intent
Mode
Best Next Page
Learn controls or first role
Casual Matches
Beginner guide
Queue with pressure and teammates
Ranked 6v6
Ranked guide
Fix one repeated miss
Practice Mode
Practice drills
Understand old 1v1 terms
Duels / 1v1 (historical — Update 59)
Update 59 history
Understand older competitive events
Tournaments / Challenger (historical — Update 64)
Update 64 history
Understand older modifier terms
Chaos Mode (historical — Updates 66/70)
Update history
2. Current Active Modes
Casual Matches — Best for learning controls, testing role fit, and building a stable input baseline before ranked.
Ranked 6v6 — The main competitive mode. The game is framed around fast 6v6 and ranked play. Before queueing, ensure someone owns first touch, second touch, attack, block, and cover.
Practice Mode — Useful when you can name one visible miss: net serve, low spike, panic dive, low set, early block, or camera drift. Update 73 added bots and hit indicators.
3. Historical / Archive Modes
Duels / 1v1 — Context found in Update 59 history. Not currently confirmed as live.
Tournaments / Challenger — Context found in Update 64. Community references describe Daily Tournaments and Challenger Tokens as past features.
Chaos Mode — Historical; referenced in Updates 66 and 70.
Ball Machines — Historical practice context in Update 62.
4. After-Match Mode Review
Match result
Meaning
Action
Touch-order chaos
Players stole touches or crowded lanes
Assign roles before next queue
Map readability broke rally
Camera or court depth felt wrong
Fix settings before changing build
Same mechanic failed twice
Miss repeated across map/teammate changes
Practice that specific touch
Reroll pressure after loss
One mode felt bad → want to spend spins
Compare fit, set a stop point first
10. LUCKY SPINS GUIDE
1. Types of Lucky Spins
Lucky Style Spins — Used for style rerolls. Better odds than normal spins. Apply toward style pity (Secret, Ultra, Evo).
Lucky Ability Spins — Used for ability rerolls. Secret Ability pity is randomized (not selected like style pity).
Do not mix style and ability spin counts in your notes.
2. How to Get Lucky Spins
Working codes (main source — see Section 1)
Season Pass rewards
Robux purchase
Official event rewards (verify current status via official Discord before claiming)
3. Lucky Spin Source Verification Order
Current working codes (copy exactly, Level 15 required)
Latest code checks (verify after source checks — do not publish reposted claims as working)
Update windows (check official Roblox/Discord before calling an event active)
Pity planning (check pity distance before spending near Secret/Ultra/Evo threshold)
Role fit (use combo and spin value tools before rerolling a playable slot)
4. Safe Spending Order
Check if current style or ability slot is actually the weak point.
Write down the repeated rally problem before opening any spin menu.
Check pity distance — if near a threshold, protect it.
Set a stop point (spin budget).
Roll only the pool that fixes the weakest slot.
After spending: test in 3 matches before spending again.
5. Do NOT Spend Yet If:
Event is unverified.
Target style/ability is not selected.
Current style or ability is already playable.
Account is below Level 15.
A code reward is missing from inventory (fix codes first).
6. What Not To Trust
Avoid any page asking for account credentials, browser cookies, Discord tokens, or two-factor codes in exchange for spins. No legitimate guide needs account access.
21. MAPS
1. Current Map Pool
Jungle Map (added Update 73) — Current in ranked rotation.
Outdoor deep-jungle and ancient-temple theme
Available in Ranked map voting
May affect: ball visibility, receive angles, camera comfort
Cyber Neon — Historical/archive map (no longer in active rotation as of current sources).
Ocean — Historical/archive (Update 70 context; Ocean_Update code was active at the time).
2. Jungle Map Ranked Tips
Visibility: Jungle environment can obscure ball tracking at certain angles. If receives or blocks are failing specifically on this map, adjust camera settings before changing build.
Map voting: Players can vote for their preferred map in ranked queue.
Touch order: The Jungle Map guide covers ranked voting, visibility adjustments, and touch-order considerations specific to the court layout.
Court comfort check: Run one casual match on the Jungle Map before a ranked session to calibrate ball-tracking comfort.
3. Map Readability vs Build
Map choice can affect readability before it affects account value:
If camera drift or court depth feel wrong → fix settings first
If ball tracking causes panic receives → mobile controls or camera sensitivity
If block timing breaks only on this map → practice block timing on the Jungle Map specifically
Only after map comfort is stable should you evaluate whether style/ability is the weak slot
4. Map Search Decision
Search phrase
Route
Jungle Map ranked
Jungle Map guide + maps hub + best settings
Map voting
Maps hub — don't assume private voting rules
Old Cyber Neon or Ocean terms
Update history (archive)
Court readability issue
Best settings + mobile controls + camera sensitivity
Spike serve — higher pressure; punishes weak receive; exposes bad power timing and rushed direction
Bump serve — control route; safer when second press is inconsistent or ball keeps hitting the net
Rule: use the serve you can land under pressure, not the one that looks strongest in a clip
Serve Pressure Ladder:
Rung
Pass signal
If it fails
Baseline power press
Start Serve and Power Selection without camera panic
Slow the second press; remove lane choice for one block
Net-clear consistency
Bump serve clears the net before adding spike serve
Use too-low fix + serve timer before adding spike serve
One lane pressure
Serve lands while targeting one repeatable lane
Aim straight; log misses; add one lane only after baseline returns
Ranked opener test
3 matches show whether opener survives scoreboard pressure
Review ranked readiness before spending
Serve Miss Matrix:
Miss pattern
Cause
Fix
Hits too low
Power press or jump timing rushed
Repeat Start Serve + Power Selection without changing aim
Clips the net
Second press inconsistent or route too aggressive
Bump serve reps until 3 serves clear the net
Goes out
Direction/tilt added before baseline was stable
Aim straight for one block; add one lane change after
Easy to read
Same aim and rhythm every point
Vary lane only after in-bounds rate is stable
Mobile mis-taps
Thumb path, camera drift, or HUD spacing
Separate camera space from serve button first
Serve Target Choices:
Target
Use when
Main risk
Straight baseline
Second press still becoming stable
Predictable after receiver settles
Deep corner
Baseline lands + opponents overstack middle
Out misses increase if direction added too early
Short reset
Opponent receives deep; team ready for short return
Easy first touch if serve is weak
Safe bump serve
Spike serve is missing; match needs clean rally starts
Too many safe serves give away pressure
Eight-Minute Drill: 2 min Start Serve only (no aim) → 2 min bump serve until consistent → 2 min add spike serve if second press is repeatable → 2 min review misses as low/net/out/readable.
3. HOW TO SPIKE
Core mechanic: Jump into a playable set, then press Bump/Spike (Left Click / RT) in midair. Hit when the ball is above the net.
Beginner rule: Neutral spike first → no tilt → land in bounds → then add tilt.
Spike Contact Checks:
Check
What to review
Fix
Low contact
Ball hit below net height or forward tilt pushes path down
Remove tilt; wait for above-net contact
Early jump
Jump starts before set reaches playable height
Delay jump; count only neutral spikes in bounds
Late contact
Reach after ball drops or camera pulls the touch late
Stabilize camera; ask for higher set
Blocked lane
Blocker reads same hit every swing
Keep rhythm; change final aim late with side tilt
Too Low Fix Matrix:
Miss pattern
Cause
Fix
Too low after forward tilt
Path pushed down before ball clears net
Remove forward tilt; wait for above-net contact; add direction later
Too low with no tilt
Jump before set reaches playable height
Ask for higher set; delay jump; count only clean neutral spikes
Blocked every time
Blocker reads same line before hit starts
Keep jump rhythm; change final aim late with side or safer deep hit
Spike goes out
Target too sharp or back tilt overused
Aim middle-third first; reopen sideline shots after 3 in-bounds contacts
Tilt Decision:
Tilt
Best use
Main risk
No tilt
First drill for beginners and too-low fixes
Predictable if repeated after defenders adjust
Forward tilt
Fast lower path when close to the net
Common too-low trigger when used too early
Side tilt
Lane change against a blocker sitting on the straight hit
Readable if same side every swing
Back tilt
Extra height or deeper safe ball when contact is low
Can float out if set is already high
Contact Timing Ladder:
Rung
Pass signal
If it fails
No-tilt contact
Ball above net; neutral hit lands in bounds
Remove forward tilt; slow jump; repeat clean reps
High contact with one lane
Spike goes to one planned target
Name the target before the jump; use slower set
Late tilt only
Tilt changes lane after timing is stable, not before
Return to neutral; compare style only after timing is readable
Ranked attack test
3 matches show same attack result vs real blockers
Move to ranked review, team rotation, or ability fit
Spike Location Three-Ball Check: Ball 1 — did set give enough height? Ball 2 — did contact happen above the net before tilt? Ball 3 — did location problem repeat with same lane or indicator cue? If 2 of 3 balls share the same miss, practice that mechanic. If miss changes every time, stabilize camera and settings first.
4. HOW TO RECEIVE
Core mechanic: Bump/Spike (Left Click / RT) on the ground for a controlled first touch. Dive (CTRL / X) only when ball is outside normal walking reach.
First Touch Decision Matrix:
Situation
First touch
Next move
Serve comes to your lane
Controlled bump
Aim toward setter lane, not straight back
Spike reachable with two steps
Move first, then receive
Stay up so second touch remains playable
Ball outside walking reach
Dive as rescue
Press CTRL/X only after path is clearly unreachable
Teammate has better angle
Leave or cover
Don't burn a random bump
Dive vs Stay-Up:
Choice
Best use
Main risk
Stay up
Serve receive, playable spikes, balls inside 2 normal steps
Standing still too long turns playable ball into late dive
Move + bump
Most ranked first-touch situations
Overpasses happen when player panics and hits too hard
Dive
Emergency saves when ball is outside walking reach
Dive spam leaves no stable pass target; steals teammate balls
Leave call
Teammate has better position or ball is not your lane
No call creates double touches or open court space
First Touch Ladder:
Rung
Pass signal
If it fails
Read before input
Know whether to take, leave, or cover before pressing
Slow first step; call lane before moving
Targeted bump
First touch points toward setter lane or safe reset
Name second-touch target before contact
Rescue dive only
Dive appears only when ball is outside normal reach
Run a short stay-up block before using more dives
Ranked receive test
3 matches: first-touch mistakes stop repeating
Review rotation, readiness, or ability fit
Receive Target Decision:
Target
Use when
Main risk
Setter lane
Teammate ready for second touch; ball can be controlled
Late or hard bump becomes an overpass
Safe middle reset
Team stretched; middle safer than forcing attack
Weak reset gives opponents time if nobody covers
Leave call
Teammate has cleaner angle or first-touch responsibility
No call creates double touches
Emergency dive
Ball outside normal walking reach
Dive spam steals teammate balls
5. HOW TO SET
Core mechanic: Set/Block (Q / LT) on the ground for a controlled set. Jump first, then Q/LT for a jump-set when extra height is needed.
Near-net rule: When the ball is tight to the net, pressing Q/LT while aimed at the opponent hands them an easy shot. Step off the net; aim sideways or backward instead.
Set Target Matrix:
Situation
Set target
Why
Ball tight to the net
Sideways or backward
Keeps set on your side; avoids handing opponent easy shot
Spiker ready outside
Outside lane
Gives hitter room to approach and aim around the block
Middle is open
Middle lane
Useful when opponent wall is late or split
No hitter ready
Safe reset
Better than setting empty space or forcing a dump
Set Height Decision:
Height
Best use
Main risk
Too low
Emergency continuation only
Spiker contacts below the net; loses angle
Playable
Most normal spiker support
Requires clear target call before hitter jumps
Very high
Slow reset when team needs time to recover
Blockers can read the lane before the spike
Dump look
Setter pressure after normal sets are respected
Predictable dumps waste second touch; expose open court
Second Touch Ladder:
Rung
Pass signal
If it fails
Stabilize first touch
Receive lands where setter can reach without sprinting
Fix the pass before blaming second touch
Call the target
Setter names outside, middle, back, or reset before Q/LT
Use role assignment so teammates know who hits next
Playable height
Hitter can jump into above-net contact without waiting
Adjust height before judging hitter ability or style
Setter pressure test
3 matches: normal sets, dumps, and cover calls survive
Review ranked route and ability fit before spending
Setter ability pairings: Minus Tempo (quick sets + tempo disruption), Zero Gravity Set (higher setup windows), Moonball (safe spacing + reset time).
When to chase Feiko: Only after normal target calls, height control, and first-touch quality are repeatable.
6. HOW TO BLOCK
Core mechanic: Set/Block (Q / LT) in midair after the hitter commits to their attack direction.
Key principle: Arrive before the hit, choose one lane, let teammates cover tips and deflections.
Block Timing Checks:
Check
Review
Fix
Early jump
Blocker jumps before hitter commits
Wait one beat after hitter rises, then press block
Late to net
Blocker still moving when attack starts
Start closer to net; arrive before reading swing lane
Wrong lane
Block slides across straight, angle, and middle with no lane call
Pick one lane; let backcourt cover around it
No cover
Deflection falls behind wall; no teammate shaded cover
Call cover before jumping; leave late blocks for a receiver
Lane Decision:
Lane call
Best use
Teammate cover
Straight
Hitter keeps aiming down the obvious line
Backcourt shades angle and short tip
Angle
Hitter beats straight blocks with side aim
Backcourt protects line and deep middle
Middle
Setter sends fast balls through center traffic
Teammates cover both sidelines after the touch
Leave / Cover
Late, low, or out of net position
Receive instead of turning late jump into open court
Block Timing Ladder:
Rung
Pass signal
If it fails
Arrive before jump
Reach blocking position before hitter starts attack
Start closer, move sooner, or leave ball for receive cover
Read hitter commitment
Jump after set and hitter path reveal a likely swing lane
Study hitter timing instead of mashing block
Seal one lane
Block removes straight, angle, or middle instead of drifting
Call one lane; let teammates cover around it
Ranked block test
3 matches: lane calls and cover survive ranked speed
If actions consistently come out "too low" (spikes, serves, sets):
Contact timing — pressing at the right moment in midair?
Set quality — is the set high enough and in the right position?
Jump timing — jumping before the set is playable? (too early = late contact)
Camera drift (mobile) — is camera movement causing contact at the wrong angle?
Tilt added too early — forward tilt before neutral contact is stable pushes the ball down
Never reroll style or ability before the neutral spike lands in bounds consistently.
8. Mechanic Priority Order
Fix in touch order — a bad receive makes sets look bad; a bad set makes spikes look bad:
Serve — does the rally start at all?
Receive — does first touch reach the setter?
Set — does second touch give the hitter a playable ball?
Spike — does the attack score or create pressure?
Block — does net defense remove one predictable lane?
Never reroll from one bad rally. Log 3 attempts, identify the repeated miss, practice that specific touch, then evaluate whether the slot needs a style or ability change.
12. PITY SYSTEM
1. Style Pity
The game tracks cumulative spins toward pity thresholds for rare style rarities:
Normal pity — reached after a certain number of spins without a rare pull
Secret pity — selected target; you choose the Secret style you're chasing
Ultra pity — similar structure for Ultra-tier styles
Evo pity — for Evolution-tier styles
Key rule: Check pity distance before spending a large spin stack. Spending near a pity threshold without checking it can waste the threshold.
2. Ability Pity
Secret Ability pity is randomized, not selected — you cannot choose which Secret Ability you receive at pity.
This is an important difference from style pity.
Do not treat Secret Ability pity as a guaranteed target chase.
3. Pity Tracker Usage
Use the Pity Tracker tool on the site to:
Record how many spins have been spent toward each pity type
Plan whether to continue spending or hold
Identify when to stop and wait for code rewards to refresh the stack
6. POSITIONS & PLAYSTYLES
1. Core Positions
Position
Main Job
Common Risk
Spiker
Finish playable sets without stealing every second touch
Tunnel vision on highlights breaks the Receiver → Setter → Spiker chain
Setter
Own the second touch, target lane, and hitter timing
Random sets make strong spikers look worse
Blocker
Take away one hitter lane and call cover behind you
Jumping early or camping net leaves open court
Receiver
Control first touch so the setter can choose the next play
Overpasses and panic dives turn defense into free balls
All-rounder
Test backup touches before locking a permanent role
Balanced answers can hide the actual skill needing practice
2. Key Rule: Position vs Style
A style or ability should support the job you can already repeat. If your style role doesn't match your recommended position, run the role picker, check inputs, then compare styles and abilities before spending spins.
3. Basic Rally Chain
Receiver → Setter → Spiker (with Blocker controlling one lane at the net)
Learn this chain before adding blocking, serving, or complex abilities.
4. Solo Queue vs Team Queue
Solo queue: Learn one main job + one backup touch. Flexibility is critical.
2v2: One player handles receive/set; one handles attack/block. Both keep emergency cover.
3v3: Name receiver, setter/all-rounder, and attacker/blocker before the first serve.
6v6: Split first touch, second touch, attack lanes, net defense, and cover so six players don't chase one ball.
5. Visible Rally Symptom Diagnosis
Repeated symptom
Likely role issue
Fix
First touch breaks
Team needs a receiver lane, not another attacker
Receive guide
No second touch
No setter route or setter is chasing first touch
Set guide + Team rotation
Attacks too low
Spiker is late, set is low, or lane not called
Too-low fix + Spike guide
Net defense open
No blocker owns one lane
Block guide + Team comps
Everyone chases
Roles are unnamed
Team rotation planner + Ranked guide
19. PRACTICE & DRILLS
1. Core Rule
Pick one visible miss, run one short drill block, then move to the exact mechanics or ranked page. Do not change style, ability, camera, and role all at the same time.
2. Practice Mode Features (Post-Update 73)
Practice bots — opponents you can hit against in a controlled environment
Hit indicators — visual feedback showing contact height and quality
3. Five-Minute Drill Ladder
Minute 1: Name the miss — serve net, low spike, panic dive, low set, early block, or camera drift.
Minutes 2–3: Run the matching route (see table below) without changing any variables.
Minutes 4–5: Repeat without changing camera, style, ability, or role at the same time.
One match: Test only that action. If the miss repeats, open the deeper mechanics page before spending spins.
4. Drill Search Route
Search phrase
First drill
Stop condition
General warmup
20-touch block + controls baseline
Stop when one repeated miss is named
Serve is unstable
Serve timer + serve guide
Stop adding aim until 5 straight serves clear the net
First touch breaks
Receive guide + touch order
Stop diving early if normal receive still reaches the ball
Spike too low
Too-low fix + spike guide
Stop judging ability value until contact height is stable
Sets leave hitters too low
Set guide + positions
Stop dumping/changing role until playable set repeats
Block timing off
Block guide + settings
Stop chasing every hitter until one block lane is sealed
Before ranked
Ranked guide + team comps
Stop queueing if warmup can't name all 5 roles
5. Mechanic Drill Ladder (Touch Order Priority)
Fix the earliest touch first — a bad receive makes sets look bad; a bad set makes spikes look bad.
Rung
Clean signal
If it fails
Serve control
Serve starts rally without net/out/panic aim
Use straight baseline serves before pressure serves
First touch
Receives become playable, not instant overpasses
Practice read-before-input; stop chasing every ball
Set height
Second touch gives hitter playable ball + clear target
Fix second-touch target before calling the spiker weak
Spike contact
Contact height and lane are readable
No-tilt contact first; check too-low before ability comparison
Block lane
Block jumps after hitter commits; cover is ready
Seal one lane instead of jumping at every fake
Team rotation
First touch, set, attack, block, cover jobs named before ranked
Assign touch order before queueing or rerolling
6. Miss-to-Drill Matrix
Visible miss
First drill
Escalate if it repeats
Serve hits net or floats out
Run 5 timed serves
Open serve guide
Spike says "too low"
Check contact height
Open spike guide
First touch becomes chaos
Run receive discipline
Assign touch order
Second touch is low or near net
Run set height drill
Recheck controls
Block jump is early
Wait for hitter lane
Stabilize camera
Bots expose the same mistake
Use Practice Bots
Leave only after repeatable contact
7. Session Types
Session
Use when
Drill
Five-minute reset
After a bad rally
Serve timer → too-low check or receive discipline
20-touch block
General consistency
5 serves + 5 receives + 5 sets + 5 attacks/blocks
Bot isolation
Bots repeat same miss
Practice Bots → block/spike timing after clean contact
Mobile controls → 1 settings change → retest contact
Post-reroll evidence
New style or ability
Style comparison → 3-match test → combo planning
8. Three-Rally Evidence Log
Evidence pattern
Meaning
Action
Same miss in 3 short rallies
Mechanic is specific enough to drill
Run the exact route for that miss
Miss changes every rally
Controls, camera, or role stability needed first
Use 20-touch block before judging any single mechanic
Mechanic clean but pressure weak
Style or ability slot may matter now
Practice-first build check before spending
Clip/Discord claim started the drill
External evidence may not match your role/patch
Separate source checking from personal drill results
9. After Practice Route
Result
Action
Miss improved
Keep the build; test in short ranked/casual block
Miss still repeats
Open the exact serve/receive/set/spike/block guide
Practice-first build check passed
Compare weak slot, check spin value and pity before spending
Claim doesn't match practice
Don't rewrite build plan until source and match evidence agree
20. RANKED GUIDE
1. Ranked Readiness Matrix
Signal
Risk
Action
Below Level 15
Rewards and match reps still unfinished
Use Level 15 planner + controls + codes after the gate
Basic controls only
Ranked mistakes look like bad teammates
Practice receive, serve, set, dive discipline
No locked role
Solo queue gets messy when everyone chases every touch
Pick one role; communicate through positioning
Unknown combo fit
Strong style can still fail without matching ability
Pair style and ability around attack/support/defense/mobility
High tilt risk
Long losing blocks waste spins and practice time
Stop after 2 frustrating losses; run a short drill
2. Before Queue Checklist
Check
Pass signal
If it fails
Control baseline
Serve, receive, set, spike, block, dive are repeatable under pressure
Serve timer or one mechanic drill first
Role lock
You can say whether your job is receive/set/spike/block/cover
Use role picker + positions guide
Combo check
Style and ability solve the same rally problem
Compare slots before spending more spins
Map comfort
Camera, court readability, and ball tracking are comfortable
Fix settings before changing build
Reward/pity risk
Code rewards and Lucky Spins have a clear spend-or-hold rule
Hold spins until weak slot and pity risk are clear
3. Ranked Session Decisions
Session state
Action
Route
Queue-ready
Play short ranked block; stop while decisions are still readable
Team comps + team rotation
Warmup needed
Run one short mechanics route before queueing
Practice drills + serve timer
Stop-loss
End ranked block; name one miss; move to practice
Too-low fix + receive guide
Map pressure
Separate map readability from role/build value
Maps hub + Jungle Map + best settings
Team chaos
Assign first touch, set, attack, block, cover before another queue
Team rotation + positions + role picker
Reward-reroll risk
Check combo fit and 3-match evidence before spending
Codes + spin calculator + combo builder
4. Solo Queue Rule
Before queueing solo, name your job: receive, set, spike, block, or cover. If you can't name it before the serve, use the role picker first. Solo queue needs one clear main job + one backup touch.
5. Ranked Search Route
Search phrase
Open first
Stop condition
Solo queue ranked
Role picker + team rotation + controls
Stop if can't name all 5 touch jobs before serve
6v6 ranked team chaos
Best team comps + team rotation + set guide
Stop before another queue if touch order not assigned
Stop spending if style/ability not tested for 3 readable matches
Jungle Map ranked
Jungle Map guide + maps hub + best settings
Stop blaming build until map visibility checked
Stop-loss after 2 losses
Practice drills + spike/block guide + source policy
Stop ranked; practice one named miss
6. Ranked Session Length
Two clean wins can be enough for one session.
Two frustrating losses = clear stop signal. Move to practice, not another queue.
After a stop, run a serve timer or receive drill before spending any spins.
7. After Ranked Block Route
Route
Use when
Action
Queue again
Wins/losses were readable; roles stayed clear
Queue one more short block with same plan
Warm up only
Serve, receive, set, or block drifted under pressure
Run one warmup block; return only if miss becomes stable
Stop and practice
Two losses triggered panic touches or rushed reroll
Name most visible miss; practice that mechanic away from ranked
Review build (3 matches)
Same style/ability issue across 3 readable matches
Compare weak slot; keep source-dated notes separate from opinion
8. What Ranked Does NOT Tell You
This guide does not know: hidden matchmaking ELO, teammate quality, rank gain/derank risk, or private vote rules. All advice is based on visible preparation signals you can control.
16. SECRET & LIMITED STYLES
1. Secret Styles (Permanent Pool)
Secret styles have very low drop rates from normal spins but can be targeted via pity:
Sanu / Sanju — Secret Spiker. High-demand style. The name "Sanu" in search maps to the current in-game "Sanju" naming. Secret Spiker role with tilt-based attack.
Feiko — Secret Setter. Can switch between support sets and dump threats. Availability is limited and returns in windows; verify current status.
2. Secret Ability (Limited)
Lead Feet — Only Secret Ability. Limited; launched Update 56, returned Update 69. Availability requires a fresh source check.
3. Limited Styles
Limited styles are available only during specific event windows. Key rules:
Do NOT spend Lucky Style Spins on limited styles based on old clips or outdated availability lists.
Verify via official Discord or the Limited Styles guide before chasing.
When a window ends, the style goes to the limited archive.
Known limited style example:
Kumo — Secret Libero/Setter style. Released June 13, 2026; limited until June 27, 2026. Normal Style Spin chance: 0.01%; Lucky Spin chance: 0.5%. Window is now ended.
4. Spin Odds Context (General Reference)
Style rarities include: Common, Rare, Epic, Ultra, Secret, Evo
Normal spin odds decrease at higher rarities
Lucky Spins have improved odds at higher rarities
Pity ensures a guaranteed rare pull after a set number of spins
23. SECRET STYLES
1. What Are Secret Styles?
Secret styles are the highest-rarity style tier in Volleyball Legends. They have very low drop rates from normal spins but can be targeted through the pity system. Key current Secret styles:
Style
Role
Status
Normal odds
Lucky odds
Sanju (Sanu)
Secret Spiker
Permanent
0.01%
0.5%
Feiko
Secret Setter
Limited (window ended June 6, 2026)
0.01%
0.5%
Kumo
Secret Libero/Setter
Limited (window ended June 27, 2026)
0.01%
0.5%
2. Target Lock Checklist (Before Spending)
Name the target — Sanju, Feiko, or another exact Secret style. Don't chase "Secret rarity" alone.
Name the role — Does the target match the job you actually play?
Check the window — Is the style currently available? Verify via official Discord for limited styles.
Check the counter — Use the Pity Tracker; keep Lucky Style pity separate from ability pity.
Prepare the team route — Will the new style change a lane assignment or just the inventory label?
3. Secret Style Search Routes
Search phrase
Likely intent
Action
Sanu / Sanju spike intent
Secret Spiker for tilt pressure
Sanu guide + spike timing
Feiko setter intent
Secret Setter for dump pressure
Feiko guide + set guide + verify availability
Not sure of target
Wants Secret label without role/target
Role picker + style comparison first
Limited or returning Secret
Needs availability context
Limited styles guide + next update watch
Code reward into Secret chase
Just redeemed spins
Spin value calculator + pity tracker
4. When to HOLD (Do Not Spend Yet)
Target is not selected in-game
Event state is unverified or watch-only
Feiko/Kumo availability window has not been confirmed as reopened
Current style already fits your role
Code reward has not appeared in inventory yet
5. Post-Pull Route
Result
Action
Got Sanju
Test spike timing, tilt pressure, attack lane discipline before declaring it solved
Got Feiko
Test setter deception, dump timing, second-touch decisions before ranked
Got another playable style
Compare role fit before rerolling a rare but useful slot
No target yet
Stop chase; choose role path before spending next stack
Reward missing
Don't change pity notes until the reward path is resolved
6. Secret Style Pity (Important Distinction)
Style pity = selected target — you choose which Secret style you're chasing
Ability pity = randomized — you cannot choose which Secret Ability you receive at pity
These are two completely different systems; never confuse them when planning a chase
17. SPECIFIC STYLE GUIDES
1. Sanu / Sanju Guide
Name note: "Sanu" is the previous public name; "Sanju" is the current in-game wiki name (Fandom revision 6656, timestamp 2026-06-01). Both refer to the same style. Treat all "Sanu" searches as pointing to Sanju.
Facts (source: Fandom Sanju revision 6656, June 2026):
Parameter
Value
Current name
Sanju
Previous name
Sanu
Role
Secret Spiker
Rarity
Secret
Status
Permanent
Normal Style Spin chance
0.01%
Lucky Spin chance
0.5%
Signature mechanic
Direction-changing spike tilt
Balance note
Left/right tilt nerfed by 15% on May 10, 2025
What Sanju does: Changes spike direction by a few degrees when tilting. Used for attack-angle pressure against blockers who read the same lane repeatedly.
Tilt mechanics:
Practice neutral contact first — land the spike above the net without any tilt.
Only add left or right tilt after the blocker commits to a lane.
If hits go too low, fix jump timing and contact height before judging the tilt.
Tilt fact boundary: the wiki records "a few degrees" of direction change; no hidden angle math is confirmed.
Tilt drill:
Run 10 spikes with no tilt from a playable set; count only in-bounds contacts.
Add left or right tilt only after 3 neutral spikes clear the net in a row.
If still too low, fix jump timing and camera angle before spending more spins.
When to keep Sanu/Sanju:
You can time jump contact and use tilt without sending easy balls out.
Three-match evidence is positive.
You are at or near a pity target.
When to reroll:
Your team needs a stable receiver, setter, or low-risk first touch more than another attacker.
Points keep being lost before the ball ever reaches your attack lane (serve/receive problem).
Best ability pairing: Curve Spike or Shield Breaker
Matchup ladder:
Comparison
When to choose Sanu/Sanju
When to choose the other
Sanu vs Kijo
Attack pressure with simpler tilt reads
Kijo: high-skill charged Super Tilt angles
Sanu vs Mikage
Point-ending spikes
Mikage: defensive coverage and rally extension
Sanu vs Kazana
Tilt control is repeatable
Kazana: simpler attack reads for beginners
Sanu vs Feiko
Front-row finishing
Feiko: second-touch control and dump pressure
How to get Sanju:
Check current codes for free Lucky Style Spins.
Confirm Sanju is in the current style pool (it's permanent, so it should be).
Use the Pity Tracker before spending a large stack.
Do NOT chase from a small stack without checking pity and role fit.
⚠ Availability warning: The June 6, 2026 window has ended. Treat Feiko as unavailable until an official Discord post or fresh in-game source confirms a new rerun. Do NOT spend Lucky Style Spins on Feiko based on old clips or reposted availability lists.
What Feiko does: Secret Setter that can switch between a normal jump set and a short dump shot aimed at open court space. Value depends on making the normal set and the dump look identical until the defender commits.
Dump Set mechanic:
Use the same approach and jump motion for both normal sets and dump shots.
Dump only after the receiver or blocker commits away from the short lane.
Value drops if the dump timing is telegraphed or teammates never convert the normal set.
Feiko drill route:
Drill
Goal
Set disguise repeats
Use the same approach for normal jump set and dump set
Short-court read
Dump only after receiver/blocker commits away from short lane
Three-set check
Record 3 setter possessions: was first touch playable? Did dump/set look similar? Did team convert?
When to keep Feiko:
You already own it from a previous window.
You can alternate normal sets and dump threats without telegraphing.
Your team converts the attack after your sets.
When Feiko is NOT the solution:
Points lost from receive, serve, or simple attack timing before a set is available.
You want simple spiker pressure instead of setter deception.
Best ability pairing: Zero Gravity Set or Minus Tempo
Matchup ladder:
Comparison
Feiko
The other
Feiko vs Kijo
Setter deception and dump pressure
Kijo: spiker tilt and charged Super Tilt attacks
Feiko vs Taichou
Aggressive short-court reads
Taichou: safer support when team needs stable setup first
Feiko vs The Twins
Focused second-touch pressure
The Twins: all-rounder coverage and flexibility
Feiko vs Sanu
Setup and rally creation
Sanu: front-row attack finishing
3. Ibara Guide
Context: Update 73 added charge-rate buffs to Ibara. This changed its viability relative to older tier data.
Rule: Always check the Update 73 Ibara route before treating older Ibara tier data as current. The buff specifically affects how fast Ibara charges its signature mechanic.
Practical check: If you owned Ibara before Update 73 and it felt weak, test it again post-buff before spending Lucky Style Spins to reroll it.
4. Style Stats Reference (from Fandom — use as role context, not hidden meta proof)
Style
Notable Public Stats
Role
Feiko
Set 100% / Jump 100% / Speed 85%
Secret Setter
Sanju (Sanu)
Tilt mechanic; 15% nerf to left/right tilt (May 10, 2025)
Secret Spiker
Kumo
Released June 13, 2026; limited until June 27, 2026; 0.01% normal / 0.5% Lucky
Secret Libero/Setter
Warning: Published stat percentages reflect public Fandom snapshots. Do not use them as hidden win-rate data or guaranteed ranked performance predictions.
15. STYLE-ABILITY COMBOS
1. Overview
Pair your style with an ability that supports the same rally plan for your role. A spiker style paired with a defender ability wastes one slot; a setter style paired with a finisher ability wastes the other.
2. Recommended Pairings by Role
Role
Style Candidates
Ability Candidates
Spiker
Sanu, Kazana, Jinko, Kijo
Shield Breaker, Divine Strength, Curve Spike
Setter
Feiko, Taichou
Minus Tempo, Zero Gravity Set, Moonball
Receiver
Mikage, The Twins
Magnetic Pull, Extra Touch, Rolling Thunder
Blocker
Mikage, Encho
Steel Block, Magnetic Pull, Boom Jump
All-rounder
Hidari, Feiko, Yogan
Extra Touch, Magnetic Pull, Boom Jump
3. Style-Ability Matrix
The full style-ability matrix on the site cross-references every style with every ability for specific role and weakness matchups. Use the Combo Builder tool to:
Enter your current style and ability
Identify role gaps the combo creates
Find which opponents the combo handles vs. which it struggles against
13. STYLE KEEP / REROLL GUIDE
1. Three-Match Evidence Rule
Never reroll from one bad match. Play 3 short matches and write down the repeated issue before making any spin decision. If the same issue appears in at least 2 matches, route the fix to the slot that caused it.
2. When to Keep a Style
Role fit is stable (style supports your actual match job)
Spin stack is small
Pity counter is close to a threshold
Style fixes a repeated mistake
Newest tier claim has no dated source
3. When to Reroll a Style
The style role doesn't match what your team actually needs
Three-match evidence clearly shows the style is the weak slot
You have enough Lucky Style Spins + a clear target
Pity is far from threshold (no risk of wasting pity)
4. Stop-Loss Principles
Before rolling, note what visible rally problem you're trying to fix.
Set a maximum spin count for this session.
Stop after reaching that count regardless of result.
Retest in 3 matches before rolling again.
5. Style Source Rule
A tier list should not be the only reason to reroll. Wait for: official patch context + public guide agreement + 3-match player evidence showing the slot is the real problem.
8. STYLES TIER LIST
Last checked: June 29, 2026. Source: independent editorial + Fandom styles reference (revision 7553) — 41 total styles, 23 permanent, 18 limited.
1. Tier S — High-Impact Ranked Picks
Prioritize styles that directly change point pressure, blocking windows, or spike placement.
Style
Role
Keep If
Reroll If
Paired Ability
Sanu (also: Sanju)
Spiker
You can time jump contact and use tilt without sending balls out
Your team needs stable receiver/setter more than another attacker
Curve Spike or Shield Breaker
Encho
All-rounder
You position early and want a style that rewards front-row timing
You need raw speed or a simpler solo queue role
Magnetic Pull or Extra Touch
Kazana
Spiker / Server
You want a strong style that can score before mastering all advanced tilts
You're losing points before the set reaches you
Divine Strength or Curve Spike
Jinko
Spiker / Server
You like directional serves, sharp attack angles, and baiting blockers
You prefer predictable contact timing over curve-heavy reads
Curve Spike or Minus Tempo
Mikage
Blocker / Receiver
You enjoy stopping attacks and restarting messy rallies
Your team already has defense but lacks a reliable point closer
Steel Block or Magnetic Pull
2. Tier A — Strong Role Specialists
Excellent when the team already knows who sets, who receives, and who closes the point.
Style
Role
Keep If
Reroll If
Paired Ability
The Twins
All-rounder
You understand multiple roles and want a kit that adapts between rallies
You're still learning basic serve, receive, set timing
Extra Touch or Boom Jump
Feiko
Setter
You can switch between support sets and dump threats without making the read obvious
You want a simple spiker route or team needs safer receiving
Zero Gravity Set or Minus Tempo
Kijo
Spiker
You can wait for clean sets, charge tilt deliberately, and aim side angles
You need safer receiving, blocking, or simpler setter route
Curve Spike or Minus Tempo
Taichou
Setter
You want a stable setup style for ranked practice
You need mobility or emergency defense first
Extra Touch or Minus Tempo
Yogan
All-rounder
You switch between roles and want fewer dead matches from team composition
You already know you only want spiker or blocker practice
Magnetic Pull or Boom Jump
Hidari
Spiker / Server
You can combine serve reads with fast point pressure
You need a forgiving beginner style for receiving first
Curve Spike or Super Sprint
3. Tier B — Reliable Ladder Choices
Playable and useful, but more dependent on role fit or player timing.
Kyamo · Bakuri · Hirakumi · Okazu · Kisuki
4. Key Principle: Role Fit Beats Raw Hype
Do not reroll a rare style just because a tier label moved. A dedicated setter, blocker, or receiver often wins more ranked games than a high-hype spiker on an account that already has enough attack pressure.
5. Style Tier Search Decision Matrix
Search intent
First answer
Stop condition
Best style overall
Check role fit before copying the top label
Stop if current style already supports your main role
Sanu / Sanju style
Treat as spiker-pressure watch, not automatic reroll target
Stop after 3 matches if problem is timing, not style
New codes gave style spins
Separate Lucky Style Spins from Lucky Ability Spins
Stop when next spin doesn't change the role problem
Style feels bad after one match
Collect 3-match evidence before blaming the pull
Stop if same mechanic fails across different styles
Patch changed style tiers
Hold until source check separates update notes from reposts
Stop if claim has no dated source
22. TEAM COMPS
1. Core Principle: Role Chain Before Style Chain
Build the team around touch order first. Receiver → Setter → Spiker, then add Blocker and cover. Only after roles are clear should you ask which styles (Sanu, Feiko, Mikage, Kijo, etc.) and abilities support each job.
BECOME THE KING OF THE COURT in Volleyball Legends!!
🏐🔥🔥FAST-PACED 6v6 Volleyball
Play a pickup Volleyball game with friends OR challenge anyone in a RANKED match
🎮CONTROLS:
Bump, Spike in Midair - CLICK [PC], RT [CONSOLE]
Set, Block in Midair - Q [PC], LT [CONSOLE]
Dive - CTRL [PC], X [CONSOLE]
❓HOW TO SERVE:
Once it is your turn to serve, click on screen (RT on console). Click again to choose power.
You can jump and spike the ball (tilt to change direction of the ball).
You can also let the ball drop to bump serve the ball in.
Premium benefits: Premium players receive +10% Yen
New updates weekly Saturdays at 11:30am EST!
Follow the game so you don't miss out!
💛LIKE, FAVORITE, and JOIN the group for REWARDS!

![[UPD] Volleyball Legends](https://tr.rbxcdn.com/180DAY-a7e54c63071c2e78e469b19e15f67b51/384/216/Image/Webp/noFilter)
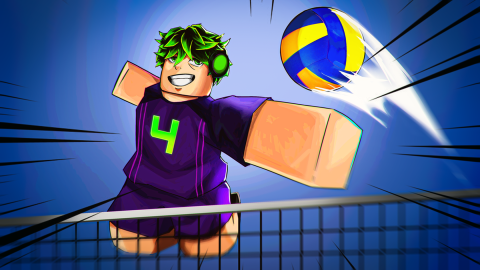
![[UPD] Win A World Championship](https://tr.rbxcdn.com/180DAY-df4bd61fa8a2a8e0d08906e764de01c5/384/216/Image/Webp/noFilter)

![[RANKED] Super Head Soccer](https://tr.rbxcdn.com/180DAY-63bee758895da8b746dd96bca56c749c/384/216/Image/Webp/noFilter)
![[2X] Skate Off!⛸️ [BETA]](https://tr.rbxcdn.com/180DAY-928d87cec7a269fc2d295868316de966/384/216/Image/Webp/noFilter)
![[UPD] Soccer Stars 26](https://tr.rbxcdn.com/180DAY-ce0c2ceb6cc431fa02c4ba67fc906500/384/216/Image/Webp/noFilter)
![[UPD] Build Your Soccer Squad](https://tr.rbxcdn.com/180DAY-73d2f5755bd607a80628288912d1e5e6/384/216/Image/Webp/noFilter)
![[IZURE⚡] Basketball: Zero](https://tr.rbxcdn.com/180DAY-172a2e597bf0215d19a966631470a63a/384/216/Image/Webp/noFilter)
![[🐉 NEW PARK] Arcade Basketball 🏀](https://tr.rbxcdn.com/180DAY-d0010f8543e0146007d9beb8574d655e/384/216/Image/Webp/noFilter)

![[⚽1 YEAR] BL:R RECREATION](https://tr.rbxcdn.com/180DAY-078bcb7660858a0ebbd93b25dfeb6573/384/216/Image/Webp/noFilter)