
![[🎸MUSIC] Rintama High](https://tr.rbxcdn.com/180DAY-8a1090d5efd67dcf96af0853c9a99c65/384/216/Image/Webp/noFilter)
There are currently 9 active Rintama High codes.
| Code | Reward | Status | Date | |
|---|---|---|---|---|
AGERATING | 5 Reroll Tokens, 500 Yen [Expires August 30th] | ✓ Working | 22/08/2026 | |
DOWNTAMA | 2500 Yen, 10 Rerolls | ✓ Working | 10/08/2026 | |
ILOVECAMERAS | 5 reroll tokens | ✓ Working | 02/08/2026 | |
ROLEPLAYSERVERS | 5 reroll tokens | ✓ Working | 31/07/2026 | |
THISCODEGIVESEXACTLYONEREROLL | 1 reroll token | ✓ Working | 30/07/2026 | |
WHYISTHEGAMESOLAGGY | 3 reroll tokens | ✓ Working | 30/07/2026 | |
WELCOMEBACKRINTAMA | 10 reroll tokens | ✓ Working | 29/07/2026 | |
WEARENOTPAYTOWIN | 3 Reroll Tokens | ✓ Working | 27/07/2026 | |
LAUNCHWEEK | 5,000 Yen and 5 Reroll Tokens (Lasts for 1 week) | ✓ Working | 27/07/2026 |
Know a code we missed?
- 1Launch [🎸MUSIC] Rintama High on Roblox and join any server
- 2Look for the Twitter bird or gift box icon on the side of the screen
- 3Click it to open the code redemption menu
- 4Type or paste your code exactly as shown above
- 5Press Redeem — your reward appears instantly
| Code | Reward | Status | Date |
|---|---|---|---|
RELEASE | 2,500 Yen and 10 Reroll Tokens (Lasts until tomorrow) | ✗ Expired | 27/07/2026 |
GETACAMCORDER | 1,500 Yen | ✗ Expired | 27/07/2026 |
bumdev | 5 reroll tokens and 2000 yen | ✗ Expired | 27/07/2026 |
STYLEJOBMONEYFIXES | reward not specified | ✗ Expired | 27/07/2026 |
NOMORETOOLREQUESTSEXPLOIT | 3000 Yen and 2 Rerolls (Expires on the 29th) | ✗ Expired | 27/07/2026 |
CREEPERMAN | reward not specified | ✗ Expired | 27/07/2026 |
HEIGHTWILLALWAYSBESCALETO | 5 Reroll Tokens | ✗ Expired | 27/07/2026 |
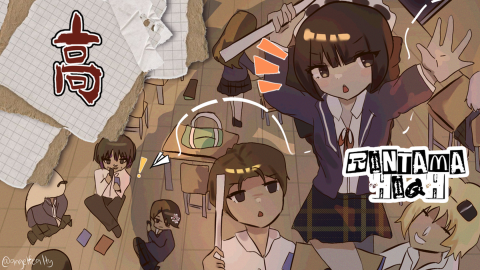
Basic PVP Info & Tips
1. General Information/Tips
Acronyms/Terms:
- M1 - Left Mouse Click (LMB)
- M2 - Right Mouse Click (RMB)
- GB - Guard Break
- I-Frames - Invincible / Invincibility Frames
- CD - Cooldown
Red Stun
- The opponent cannot block or evade during this state
- You can tell if you’re in Red Stun if the diamond turns Red
- You can tell if the opponent in Red Stun if their lock on highlight turns Red
E - Evade
- Evading gives I-Frames, allowing you to avoid getting hit
- You can tell if you have I-Frames active if the diamond turns Blue/Cyan
- You can tell if the opponent has I-Frames if their lock on highlight turns Blue/Cyan
F - Block
- Most blocks are a generic full 360 block.
- The CD for Block starts when you press F, not when you release F.
M1 + M2 = GB
- After you land a GB, use an m2 to follow up and then back away. (Brawler/Beast)
- If you use this on someone who isn’t blocking, this’ll knock them down and ragdoll them
- For the people who don’t know, you can m2 someone who's downed
Baiting Examples:
- Bait/Zone against GB, whiff an m1 into the air, and land m2 (RISKY due to endlag)
- If the opponent is blocking, m1 them. The opponent will unblock and m1 you back, then when they m1 you, go for an Evasive Strike and combo them in red stun.
- If you hold down block long enough, throw an m1 out. Your block will be off cooldown if waited long enough, allowing you to press block again to block their counterattack. Then you can counter their counterattack.
Perfect Blocking:
-
Blocking at the exact moment of a GB/Ragdolling move will cancel it entirely
General tip: Don’t waste your evade. The opponent can corner you with options, and you’ll have no way of escaping. INF COMBOING IS FRP/BANNABLE
2. Brawler 👊
Playstyle: Passive/Defensive
E + M2 = Evasive Strike
- Landing this will put the opponent in red stun, delay the m2 to guarantee red stun
- If you land your Evasive Strike, immediately use the following combo: 4x m1 > 2x m2
- If you press m2 too early, it won't guarantee red stun. You’ll need to drag out the evade/animation to guarantee red stun.
- If you land this during the opponent’s endlag/any animation, you’ll guarantee red stun. (even if you don’t delay the m2, landing it in an animation will prompt red stun.)
E + E = 2nd Evade
- If you miss your Evasive Strike, pressing E again will make you roll and give you I-Frames to escape punishment.
- You can only roll a second time while this icon is blue, located at the bottom left of the screen.
Run + M2 = Drop Kick
- If you run for long enough and press m2, you’ll perform a Drop Kick
- Guard Breaks on block, ragdolls if they don’t block
- You can cancel the endlag or bait opponents by using Evasive Strike
Combos:
-
Main Combo : Evasive Strike > 4x m1 > 2x m2
- (You can GB into this combo, however…)
- (GBing into the Main Combo is not 100% guaranteed; experienced players can escape it by evading out of it.)
- (You can GB into this combo, however…)
-
Additional Combo : 2x m1 > m2 > m2
- (When you land the first m2 in this combo, it’ll gut punch them and put them in an unresponsive position)
- (During this time, you can get in a free m2 in their “gut punch animation” before they’re fully ragdolled.)
- (When you land the first m2 in this combo, it’ll gut punch them and put them in an unresponsive position)
-
Guard Break Combo: 2x m1 > m2 (GB) > Evasive Strike > 4x m1 > 2x m2
- (This combo can only be performed if you GB the opponent after two m1s)
- (2x m1 > m2 will confirm the GB combo)
- (This combo can only be performed if you GB the opponent after two m1s)
Tips: Fighting with Brawler:
-
Block often to try to bait any openings
-
Brawler is all about punishing and landing an Evasive Strike. It’s often best not to m1 trade with faster styles
-
Get creative, don't use the same strategy over and over; otherwise, they’ll learn to counter it
Fighting against Rush:
- Hold block often
-
Use your Evasive Strike to punish their m1 string/Flurry
-
You can time an Evasive Strike or a block at the end of their full combo (if they time it poorly)
Fighting against Beast:
-
- Hold block often
-
Save Evade/Evasive Strike until they use theirs
-
Be cautious of Beast baiting with their m2
-
Get hits in as quickly as you can, then run. You want to use short combos
3. Beast 👹
Playstyle: Defensive/Aggressive
E + E = 2nd Evade
- Pressing E again will make you roll and give you I-Frames
- You can only roll a second time while this icon is blue on the bottom left of your screen
M1 + M2 = GB
- Pressing m1 then m2 performs a GB
- Beast’s GB is a Drop Kick, so it has more reach than the average GB/m2
Combos: (Most combos aren’t true.) Bread & Butter :
-
m1 > m2 > m2
- (Use this if the opponent is blocking)
- (Guard Breaks / GBs)
- (The second m2 cancels the endlag of the first m2)
-
2x m1 > m2
- (Use this if the opponent isn’t blocking)
- (Guard Breaks / GBs)
- (Longer combo, more damage)
Techs:
-
Bait/Zone with your GB, wiff an m1 into the air, and land m2 with your extended reach
(RISKY due to endlag)
Tips: While fighting with Beast:
-
Combos are rarely true
-
Your Evade/M2 can cancel your GB’s endlag
-
You can poke with raw m2 due to it having more reach than most m2s
- While blocking, you can use your m2 to cancel their attack(s) if timed right.
-
Pay attention, wait for the opponent to evade before you do
- Your Evasive has a shorter cooldown than most other styles
-
If you can learn to play without your evade, you’re set
While fighting against Beast:
-
Usually, wait for the Beast to use their evade first so that you can punish them with your evade
-
Take advantage of Beast’s disadvantages:
- High endlag
- Moderate windup
- Limited options = predictability
- High endlag
4. Rush 💨 (Not recommended for beginners)
Playstyle: Rushdown
E + E + E + E = Evades
- Similar to Brawler’s second evade, Rush has 4 total evades
- The first 2 evades don’t give I-Frames
E + M2 = Evasive Strike
- Landing this will put the opponent in red stun
- Regular Evasive Strike, is blockable
- If you land your Evasive Strike, immediately use the following combo:
- 5x m1 > charged GB (IF HIGH PING)
- 8x m1 > charged GB (IF LOW PING)
- Evasive Strike is chargeable.
- (Charged Evasive Strike can GB.)
- (On GB, it does not red stun.)
- (Occasionally, due to the difference in ping between you and your opponent, your Charged Evasive Strike can go through block and red stun them.)
- (TLDR: your Charged EM2 will be 50/50 redstun when you GB)
- (Occasionally, due to the difference in ping between you and your opponent, your Charged Evasive Strike can go through block and red stun them.)
M1 + M2 = GB (Chargeable)
- You’re able to hold down on M2 for more damage and break their guard
- If you charge it and it hits someone who isn’t blocking, it’ll red stun them
- Breaking their block (GBing) will not give red stun
F - Block
-
Rush’s block only covers in front, open to attacks behind it
(180-degree block)
Bread & Butters**:**
-
Flurry : 1-2x m1 > m2
- (This does not GB)
- (You can use this when the opponent isn’t blocking)
- (Not recommended to charge m2)
- (This does not GB)
-
Flurry EX**: 3-5x m1 > m2** (I made this name up)
- (This does GB)
- (Use this up close as a pressure tool)
- (This flurry, compared to the prior one, has higher priority over most moves and will hit through them.)
- (Follow up with the regular flurry if you GB them so you can ragdoll them)
- (The longer/more m1s you use, the more of a window you have to react to the opponent’s evade with your own evade/evasive strike.)
-
Full Combo : Evasive Strike > 8x m1 > charged m2
- (Only use this after the opponent wastes their evade first)
- (Do this because the combo isn’t true on the last hit)
- (The charged m2 at the end is escapable if the opponent has their evade)
- (Only use this after the opponent wastes their evade first)
-
Combos
- 3x m1 > m2 > GB > 1x m1 > m2
Tips: While fighting with Rush:
- Apply pressure with your speed & flurry (preferably the EX variant)
- If the opponent dashes out of your flurry, try to spam your evades and pursue them. Wait till their evades are finished and hit them with the Full Combo (Evasive Strike > 8x m1 > charged m2).
- Your m1s have little to no endlag.
- If the opponent is holding down block, use a flurry, but don't use a finisher (m2) until your opponent responds with an evade/evasive strike. To which you respond with your own evasive strike.
- Generally, spam Flurry EX on the opponent. Keep an eye out for the opponent Evading/Evasive Striking out of your flurries, and respond with your own Evasive Strike
- Take advantage of the duration of I-Frames on your evades, especially since you have 4 of them.
- Sometimes your Flurry EX just wont guard break the opponent.
Gameplan:
- Approach the opponent and use a Flurry EX (3-5x m1 > m2)
- Opponent is prompted to block or evade out
-
If they block, guard break them and repeat the Flurry EX
-
If they evade, you follow their evasive with your own
- While they finish evading, punish them with your Evasive Strike
- Finish it with a:
- Flurry EX (3-5x m1 > m2) [SAFER OPTION]
Or
- Full Combo (Evasive Strike > 8x m1 > charged m2) [RISKY]
- Flurry EX (3-5x m1 > m2) [SAFER OPTION]
Or
- Finish it with a:
While fighting against Rush:
- While they finish evading, punish them with your Evasive Strike
-
Avoid m1 trading
-
Take advantage of their lack of a 360-degree Block.
-
Rush’s guard break doesn’t apply red stun.
-
Rush’s first 2 evades don't have I-Frames*(?)*
-
You can often hold block and Evasive Strike them during their flurry to punish them.
-
If they spam flurry on your Block, you can use an m2 early during their flurry as a get-off tool and cancel their m1 string before they m2.
(Alternatively, you could use Evasive Strike.)
5. Speedstar [V.1] ⭐ (Semi-Unobtainable)
Playstyle: Rushdown/Aggressive
E + M2 / E + E + M2 - Evasive Strike
- Speedstar gets to evade twice, rather than once like Brawler
- Landing this will put the opponent in red stun, delay the m2 to guarantee red stun
- (Blockable)
- You cannot roll after landing/missing an Evasive Strike, very punishing if you miss it.
E + E + E - Rolls
- Acts very similarly to Brawler’s second evade. Speedstar has 2 evades, then a roll.
M1 + M2’s Guard Break Red Stun
- Speedstar’s GBs apply red stun
- You can Evasive Strike on any GB from Speedstar, however . . .
- m1 > m1 > m2
- (This one is the easiest to do an Evasive Strike Combo off of.)
- m1 > m1 > m2
- The GB on Speedstar is invisible, allowing you to hit people quickly or without being seen.
- (The GB applies red stun due to a lack of animation.)
Combos:
-
Main Combo : Evasive Strike > 6x m1 > m2
- (Standard Evasive Strike Combo.)
- (The timing of transitioning from m1s to m2s is hard.)
- (Spam m1s till you hear 4 consecutive fast kicks, then press m2)
-
Extended Combo: GB Stun > 6x m1 > Evasive Strike > 6x m1 > m2
- (You have to land a Guard Break to pull this off.)
- (Your Evasive has to be off cooldown for this.)
- (To consistently extend, make sure you’ve used your Evasive Strike after you done your inputs on the initial 6x m1s)
- (If you spam your m1s early, you’ll be able to use your Evasive Strike while the animation is still processing.)
- [Example of Speedstar Extended Combo]
Tips:
- Speedstar users automatically get a 1.35x damage buff because it has bad damage
While fighting with Speedstar:
- The general playstyle is:
- Pressure with m1 string combos
- If Evasive is on cooldown, pressure with GBs (m1 > m2 or m1 > m1 > m2)
- If you land a GB, follow up with your standard combo (6x m1 > m2)
- You’re unable to immediately block after using an m1.
- Because of its strange hitboxes and odd timing, more often than not, Speedstar will suffer from being zoned/ranged. This means that to capitalise on its strengths properly, wall combing or leaving someone on the ground to regain Evasive Strike will massively help you.
- Generally, Speedstar is a rushdown, but it severely lacks range, so once you start applying pressure, don't stop.
- (A great way to do this is to instantly kick someone off the ground into another m1 m2, confusing your target.)
- Most of the time, when you kick someone off the ground with Speedstar, they’ll have a higher advantage when it comes to m1s. Back up and make them whiff their m1s so you can punish them with your own m1s.
- Your GB applies stunlock, but when you use it fully as a ragdoll, it does a ton of extra damage.
- (It also has little to no endlag, so you can instantly m2 them during their ragdoll.)
- Since you get 2 Evasives, first Evade back, then do an Evasive Strike. It’s an easy stunlock, since your opponent will just assume you are evading. You can also fake using Evasive Strike and just dash twice to Evade an m1 and get I-frames, then m1 them and guardbreak if possible.
While fighting against Speedstar:
- Speedstar’s GB is hard to react to; the animation for the m2 isn’t visible.
- If you see someone with Speedstar running at you, try and hit them before they can hit you.
- Speedstar has terrible first m1 hitboxes, so if you run from them, they can't hit you unless they catch up. This means it's best to play a zoning style against Speedstar.
- (Styles like Beast and Rush have a particular advantage in this regard.)
- Bait their m1 trade. Due to the inability to quickly reblock, you can easily Evasive Strike or m1 them again, just don't hold block after the first m1, so they can't guardbreak you and get a full combo off.
- (You can usually tell if they've m1'd you or not by whether your character gets pushed back or not.)
- It takes a moment to block after using any attack on Speedstar; use that to your advantage.
CHARACTER SELECTION
Upon pressing continue on the loading screen you are presented with a selection screen for all slots you own. The slot you select will load that specific character data and character. Each player can have up to 5 characters total.
Everything about the character can be changed upon returning to the creator again, data such as money or items will remain the same.
CHARACTER CREATOR
Selecting an empty slot will always bring you to the character creator place. Here you have full freedom to customize the character of your dreams. Pressing Q or E lets you rotate the character. May be different depending on the device you use!
CHARACTER TAB
The first tab allows you to change the following: Skin color
Hair color
Name
Height
Gender
Body Type
Head
Hair
CLOTHING TAB
Clothing tab allows you to change the shirt and the pants. Rintama uses classic 2D clothing. Should you enter the ID of the item in the wrong place it will not work!
ACCESSOIRES TAB
The Roblox Marketplace offers many different accessoires to be worn for characters. By COPYING the ID and PASTING it in the field you can add any item you like. Once added two new buttons will appear next to it. The setting circle icon will open up the option to scale, rotate and size whatever item you have. Hair will allow you to change the texture of it.
You are able to drag the field around by holding on it.
SAVING A CHARACTER
Once done creating the character you can hit SAVE and enter the game. Make sure you entered a name before saving.
Should you ever want to change a character you can press Customize Character in the phone settings and return to the creator.
Introduction
1. Welcome to Rintama High
Located within the city of Hokuheki located in the Rikugawa Prefecture of the Kobetsu Region is a school full with a turbulent and mysterious past.
The year is 2006 and the city is healing from the scars of it's past, and with a new administration set to replace the beloved Mayor Murai who guided the city through the ashes left from the corruption of his predecessor's administration, changes are certain but, however, the city is still home to a small criminal underworld, with a history of citizens ending up severely injured, dead, or missing as a result of encounters with groups within it.
The once delinquent plagued school, Rintama High, is actively taking measurements to fight the student violence within the school that damaged its once prestige reputation. Fights are still common, bullying is a daily occurance and many tend to lean against the faculty rules. Without a leading Bancho to rule the school this violence will only increase.
You ended up in Rintama High, most likely not by choice, but this is all you got so make the best out of it and stay alive!
2. Rintama Explained
Rintama High and its world is a fictional place in Japan somewhat located close to Kyoto in the center of Japan. Every player is able to create their own story and narrative as they see fit built around the school. The game is heavily focused on roleplay with the option of actual fist to fist combat best suited for player versus player. A passive mode exists for those who only want roleplay.
The game offers a huge amount of activities ranging from following a ingame schedule for class over to doing sports such as basketball, volleyball or soccer or even working a job to earn money which allows players to buy items or different combat styles. There are many other small activities to do, check out the game to test them all!
3. Private Communities
Private communities are not run by the Rintama Team or overseen by it!
Players are allowed to to create their own communities and servers within Rintama High however they must follow our guidelines and rules. Should a community not enforce those rules or damage the games reputation in any way they will be blacklisted from the game and our server. You can read our rules in: #📜 | o7-rules Furthermore you can open a ticket to get the community approved by us: #staff-help
Private Servers [COMING SOON]
Owning a private server grants you the ability to host your very own roleplay events within Rintama High. The owner is granted admin within the game and can change the setting to their liking, remove players or manage whole roleplay events! This allows for players to build their very own communities inside Rintama High without the disturbance of other players that may not follow specific rules.
Wave & Applications
1. What is Wave? How do I apply?
Wave is an influx of players who we accept into the game after they finish their applications. You apply when the google form drops in #pending-shouts, they currently aren't open because we already accepted a wave of new players! Wait a bit and create an OC so you can be ready! You need 250 messages at minimum before applying.
2. Do I have to pay to play? Do I have to buy my avatar?
You do not have to pay! Although, if you do not want to wait we have a patreon where you can buy instant access! There are different tiers of patreon, so check them all out to see the benefits! Access and in-game money are one time purchases, if you wish to keep anything else in your purchase benefits then you'll need to keep renewing the patreon!
You do not need to buy your avatar. There is an in-game feature that allows you to create an avatar with a string of code. There are videos and tutorials made for you to see. But, it's typically just inserting your codes into the format.
3. Do I have to make a character creation to get waved?
No, you do not need to make one to get waved. It's only for yourself and if you want access to give you feedback on your character so far.
4. Why don't you guys like introverts or foreigners?
Realistically, in 2000's Japan (even now, to be fair), foreigners are subject to discrimination, and back then, they rarely lived there. Patreon locking foreigners is meant to ensure realism, so we don't have 50 different people roleplaying as someone from another country. - Lore Team, Micha
Additionally, if your character is introverted, shy, or quiet, we will assume you won't interact with regular characters or lore characters, as well as plots. So, it turns into an instant denial. It also helps if you write your character to be flexible for any lore path, as you don't know what you'll end up with (horror, mystery, crime, etc), and if you already pre-set what your character is going to do, it most likely won't happen. - Lore Team, Micha
5. What causes an application to be denied in general?
When the application consists of writing the bare minimum (lack of detail, not meeting sentence requirements, generally just poorly written), unrealistic or edgy characters (you nor your characters family will have yakuza ties nor should you write about extremely traumatic events and go into detail about them, be aware there's minors on lore team that could potentially read your app), if your character isn't unique (repeating shy/introverted/always angry persona rather than stepping outside the box). - Lore Team, Micha
[RINTAMA HIGH] Welcome to Rintama High, a high school infamous for its troubled past. Located in the heart of Hokuheki City, Rikugawa Prefecture, Kobetsu, it was once a place ruled by gangs, violence, and delinquency. But those days are gone. Order has been restored, and the chaos that once plagued the school has finally been stamped out. "The future's really lookin' bright, isn't it?" Info: The game just released, expect some bugs or glitches. Read the ingame guide and keybinds. Check phone for more settings! Copy and paste ID's from the roblox marketplace in order to create a character! [Enter Codes in the phone menu!]
![Twilight Daycare!✨RP [Dreamland ☁️🌙😴]](https://tr.rbxcdn.com/180DAY-fcb9cc8bb2e43a3ca264ee6127f563d5/384/216/Image/Webp/noFilter)




![[📚] Maple Hospital 🍂](https://tr.rbxcdn.com/180DAY-546ae202b920a640c26c5f40e11903a3/384/216/Image/Webp/noFilter)

[🎸MUSIC] Rintama High
There are currently 9 active Rintama High codes.
AGERATING DOWNTAMAILOVECAMERASROLEPLAYSERVERSTHISCODEGIVESEXACTLYONEREROLLWHYISTHEGAMESOLAGGYWELCOMEBACKRINTAMAWEARENOTPAYTOWINLAUNCHWEEKKnow a code we missed?
- 1Launch [🎸MUSIC] Rintama High on Roblox and join any server
- 2Look for the Twitter bird or gift box icon on the side of the screen
- 3Click it to open the code redemption menu
- 4Type or paste your code exactly as shown above
- 5Press Redeem — your reward appears instantly
RELEASEGETACAMCORDERbumdevSTYLEJOBMONEYFIXESNOMORETOOLREQUESTSEXPLOITCREEPERMANHEIGHTWILLALWAYSBESCALETOBasic PVP Info & Tips
1. General Information/Tips
Acronyms/Terms:
- M1 - Left Mouse Click (LMB)
- M2 - Right Mouse Click (RMB)
- GB - Guard Break
- I-Frames - Invincible / Invincibility Frames
- CD - Cooldown
Red Stun
- The opponent cannot block or evade during this state
- You can tell if you’re in Red Stun if the diamond turns Red
- You can tell if the opponent in Red Stun if their lock on highlight turns Red
E - Evade
- Evading gives I-Frames, allowing you to avoid getting hit
- You can tell if you have I-Frames active if the diamond turns Blue/Cyan
- You can tell if the opponent has I-Frames if their lock on highlight turns Blue/Cyan
F - Block
- Most blocks are a generic full 360 block.
- The CD for Block starts when you press F, not when you release F.
M1 + M2 = GB
- After you land a GB, use an m2 to follow up and then back away. (Brawler/Beast)
- If you use this on someone who isn’t blocking, this’ll knock them down and ragdoll them
- For the people who don’t know, you can m2 someone who's downed
Baiting Examples:
- Bait/Zone against GB, whiff an m1 into the air, and land m2 (RISKY due to endlag)
- If the opponent is blocking, m1 them. The opponent will unblock and m1 you back, then when they m1 you, go for an Evasive Strike and combo them in red stun.
- If you hold down block long enough, throw an m1 out. Your block will be off cooldown if waited long enough, allowing you to press block again to block their counterattack. Then you can counter their counterattack.
Perfect Blocking:
-
Blocking at the exact moment of a GB/Ragdolling move will cancel it entirely
General tip: Don’t waste your evade. The opponent can corner you with options, and you’ll have no way of escaping. INF COMBOING IS FRP/BANNABLE
2. Brawler 👊
Playstyle: Passive/Defensive
E + M2 = Evasive Strike
- Landing this will put the opponent in red stun, delay the m2 to guarantee red stun
- If you land your Evasive Strike, immediately use the following combo: 4x m1 > 2x m2
- If you press m2 too early, it won't guarantee red stun. You’ll need to drag out the evade/animation to guarantee red stun.
- If you land this during the opponent’s endlag/any animation, you’ll guarantee red stun. (even if you don’t delay the m2, landing it in an animation will prompt red stun.)
E + E = 2nd Evade
- If you miss your Evasive Strike, pressing E again will make you roll and give you I-Frames to escape punishment.
- You can only roll a second time while this icon is blue, located at the bottom left of the screen.
Run + M2 = Drop Kick
- If you run for long enough and press m2, you’ll perform a Drop Kick
- Guard Breaks on block, ragdolls if they don’t block
- You can cancel the endlag or bait opponents by using Evasive Strike
Combos:
-
Main Combo : Evasive Strike > 4x m1 > 2x m2
- (You can GB into this combo, however…)
- (GBing into the Main Combo is not 100% guaranteed; experienced players can escape it by evading out of it.)
- (You can GB into this combo, however…)
-
Additional Combo : 2x m1 > m2 > m2
- (When you land the first m2 in this combo, it’ll gut punch them and put them in an unresponsive position)
- (During this time, you can get in a free m2 in their “gut punch animation” before they’re fully ragdolled.)
- (When you land the first m2 in this combo, it’ll gut punch them and put them in an unresponsive position)
-
Guard Break Combo: 2x m1 > m2 (GB) > Evasive Strike > 4x m1 > 2x m2
- (This combo can only be performed if you GB the opponent after two m1s)
- (2x m1 > m2 will confirm the GB combo)
- (This combo can only be performed if you GB the opponent after two m1s)
Tips: Fighting with Brawler:
-
Block often to try to bait any openings
-
Brawler is all about punishing and landing an Evasive Strike. It’s often best not to m1 trade with faster styles
-
Get creative, don't use the same strategy over and over; otherwise, they’ll learn to counter it
Fighting against Rush:
- Hold block often
-
Use your Evasive Strike to punish their m1 string/Flurry
-
You can time an Evasive Strike or a block at the end of their full combo (if they time it poorly)
Fighting against Beast:
-
- Hold block often
-
Save Evade/Evasive Strike until they use theirs
-
Be cautious of Beast baiting with their m2
-
Get hits in as quickly as you can, then run. You want to use short combos
3. Beast 👹
Playstyle: Defensive/Aggressive
E + E = 2nd Evade
- Pressing E again will make you roll and give you I-Frames
- You can only roll a second time while this icon is blue on the bottom left of your screen
M1 + M2 = GB
- Pressing m1 then m2 performs a GB
- Beast’s GB is a Drop Kick, so it has more reach than the average GB/m2
Combos: (Most combos aren’t true.) Bread & Butter :
-
m1 > m2 > m2
- (Use this if the opponent is blocking)
- (Guard Breaks / GBs)
- (The second m2 cancels the endlag of the first m2)
-
2x m1 > m2
- (Use this if the opponent isn’t blocking)
- (Guard Breaks / GBs)
- (Longer combo, more damage)
Techs:
-
Bait/Zone with your GB, wiff an m1 into the air, and land m2 with your extended reach
(RISKY due to endlag)
Tips: While fighting with Beast:
-
Combos are rarely true
-
Your Evade/M2 can cancel your GB’s endlag
-
You can poke with raw m2 due to it having more reach than most m2s
- While blocking, you can use your m2 to cancel their attack(s) if timed right.
-
Pay attention, wait for the opponent to evade before you do
- Your Evasive has a shorter cooldown than most other styles
-
If you can learn to play without your evade, you’re set
While fighting against Beast:
-
Usually, wait for the Beast to use their evade first so that you can punish them with your evade
-
Take advantage of Beast’s disadvantages:
- High endlag
- Moderate windup
- Limited options = predictability
- High endlag
4. Rush 💨 (Not recommended for beginners)
Playstyle: Rushdown
E + E + E + E = Evades
- Similar to Brawler’s second evade, Rush has 4 total evades
- The first 2 evades don’t give I-Frames
E + M2 = Evasive Strike
- Landing this will put the opponent in red stun
- Regular Evasive Strike, is blockable
- If you land your Evasive Strike, immediately use the following combo:
- 5x m1 > charged GB (IF HIGH PING)
- 8x m1 > charged GB (IF LOW PING)
- Evasive Strike is chargeable.
- (Charged Evasive Strike can GB.)
- (On GB, it does not red stun.)
- (Occasionally, due to the difference in ping between you and your opponent, your Charged Evasive Strike can go through block and red stun them.)
- (TLDR: your Charged EM2 will be 50/50 redstun when you GB)
- (Occasionally, due to the difference in ping between you and your opponent, your Charged Evasive Strike can go through block and red stun them.)
M1 + M2 = GB (Chargeable)
- You’re able to hold down on M2 for more damage and break their guard
- If you charge it and it hits someone who isn’t blocking, it’ll red stun them
- Breaking their block (GBing) will not give red stun
F - Block
-
Rush’s block only covers in front, open to attacks behind it
(180-degree block)
Bread & Butters**:**
-
Flurry : 1-2x m1 > m2
- (This does not GB)
- (You can use this when the opponent isn’t blocking)
- (Not recommended to charge m2)
- (This does not GB)
-
Flurry EX**: 3-5x m1 > m2** (I made this name up)
- (This does GB)
- (Use this up close as a pressure tool)
- (This flurry, compared to the prior one, has higher priority over most moves and will hit through them.)
- (Follow up with the regular flurry if you GB them so you can ragdoll them)
- (The longer/more m1s you use, the more of a window you have to react to the opponent’s evade with your own evade/evasive strike.)
-
Full Combo : Evasive Strike > 8x m1 > charged m2
- (Only use this after the opponent wastes their evade first)
- (Do this because the combo isn’t true on the last hit)
- (The charged m2 at the end is escapable if the opponent has their evade)
- (Only use this after the opponent wastes their evade first)
-
Combos
- 3x m1 > m2 > GB > 1x m1 > m2
Tips: While fighting with Rush:
- Apply pressure with your speed & flurry (preferably the EX variant)
- If the opponent dashes out of your flurry, try to spam your evades and pursue them. Wait till their evades are finished and hit them with the Full Combo (Evasive Strike > 8x m1 > charged m2).
- Your m1s have little to no endlag.
- If the opponent is holding down block, use a flurry, but don't use a finisher (m2) until your opponent responds with an evade/evasive strike. To which you respond with your own evasive strike.
- Generally, spam Flurry EX on the opponent. Keep an eye out for the opponent Evading/Evasive Striking out of your flurries, and respond with your own Evasive Strike
- Take advantage of the duration of I-Frames on your evades, especially since you have 4 of them.
- Sometimes your Flurry EX just wont guard break the opponent.
Gameplan:
- Approach the opponent and use a Flurry EX (3-5x m1 > m2)
- Opponent is prompted to block or evade out
-
If they block, guard break them and repeat the Flurry EX
-
If they evade, you follow their evasive with your own
- While they finish evading, punish them with your Evasive Strike
- Finish it with a:
- Flurry EX (3-5x m1 > m2) [SAFER OPTION]
Or
- Full Combo (Evasive Strike > 8x m1 > charged m2) [RISKY]
- Flurry EX (3-5x m1 > m2) [SAFER OPTION]
Or
- Finish it with a:
While fighting against Rush:
- While they finish evading, punish them with your Evasive Strike
-
Avoid m1 trading
-
Take advantage of their lack of a 360-degree Block.
-
Rush’s guard break doesn’t apply red stun.
-
Rush’s first 2 evades don't have I-Frames*(?)*
-
You can often hold block and Evasive Strike them during their flurry to punish them.
-
If they spam flurry on your Block, you can use an m2 early during their flurry as a get-off tool and cancel their m1 string before they m2.
(Alternatively, you could use Evasive Strike.)
5. Speedstar [V.1] ⭐ (Semi-Unobtainable)
Playstyle: Rushdown/Aggressive
E + M2 / E + E + M2 - Evasive Strike
- Speedstar gets to evade twice, rather than once like Brawler
- Landing this will put the opponent in red stun, delay the m2 to guarantee red stun
- (Blockable)
- You cannot roll after landing/missing an Evasive Strike, very punishing if you miss it.
E + E + E - Rolls
- Acts very similarly to Brawler’s second evade. Speedstar has 2 evades, then a roll.
M1 + M2’s Guard Break Red Stun
- Speedstar’s GBs apply red stun
- You can Evasive Strike on any GB from Speedstar, however . . .
- m1 > m1 > m2
- (This one is the easiest to do an Evasive Strike Combo off of.)
- m1 > m1 > m2
- The GB on Speedstar is invisible, allowing you to hit people quickly or without being seen.
- (The GB applies red stun due to a lack of animation.)
Combos:
-
Main Combo : Evasive Strike > 6x m1 > m2
- (Standard Evasive Strike Combo.)
- (The timing of transitioning from m1s to m2s is hard.)
- (Spam m1s till you hear 4 consecutive fast kicks, then press m2)
-
Extended Combo: GB Stun > 6x m1 > Evasive Strike > 6x m1 > m2
- (You have to land a Guard Break to pull this off.)
- (Your Evasive has to be off cooldown for this.)
- (To consistently extend, make sure you’ve used your Evasive Strike after you done your inputs on the initial 6x m1s)
- (If you spam your m1s early, you’ll be able to use your Evasive Strike while the animation is still processing.)
- [Example of Speedstar Extended Combo]
Tips:
- Speedstar users automatically get a 1.35x damage buff because it has bad damage
While fighting with Speedstar:
- The general playstyle is:
- Pressure with m1 string combos
- If Evasive is on cooldown, pressure with GBs (m1 > m2 or m1 > m1 > m2)
- If you land a GB, follow up with your standard combo (6x m1 > m2)
- You’re unable to immediately block after using an m1.
- Because of its strange hitboxes and odd timing, more often than not, Speedstar will suffer from being zoned/ranged. This means that to capitalise on its strengths properly, wall combing or leaving someone on the ground to regain Evasive Strike will massively help you.
- Generally, Speedstar is a rushdown, but it severely lacks range, so once you start applying pressure, don't stop.
- (A great way to do this is to instantly kick someone off the ground into another m1 m2, confusing your target.)
- Most of the time, when you kick someone off the ground with Speedstar, they’ll have a higher advantage when it comes to m1s. Back up and make them whiff their m1s so you can punish them with your own m1s.
- Your GB applies stunlock, but when you use it fully as a ragdoll, it does a ton of extra damage.
- (It also has little to no endlag, so you can instantly m2 them during their ragdoll.)
- Since you get 2 Evasives, first Evade back, then do an Evasive Strike. It’s an easy stunlock, since your opponent will just assume you are evading. You can also fake using Evasive Strike and just dash twice to Evade an m1 and get I-frames, then m1 them and guardbreak if possible.
While fighting against Speedstar:
- Speedstar’s GB is hard to react to; the animation for the m2 isn’t visible.
- If you see someone with Speedstar running at you, try and hit them before they can hit you.
- Speedstar has terrible first m1 hitboxes, so if you run from them, they can't hit you unless they catch up. This means it's best to play a zoning style against Speedstar.
- (Styles like Beast and Rush have a particular advantage in this regard.)
- Bait their m1 trade. Due to the inability to quickly reblock, you can easily Evasive Strike or m1 them again, just don't hold block after the first m1, so they can't guardbreak you and get a full combo off.
- (You can usually tell if they've m1'd you or not by whether your character gets pushed back or not.)
- It takes a moment to block after using any attack on Speedstar; use that to your advantage.
CHARACTER SELECTION
Upon pressing continue on the loading screen you are presented with a selection screen for all slots you own. The slot you select will load that specific character data and character. Each player can have up to 5 characters total.
Everything about the character can be changed upon returning to the creator again, data such as money or items will remain the same.
CHARACTER CREATOR
Selecting an empty slot will always bring you to the character creator place. Here you have full freedom to customize the character of your dreams. Pressing Q or E lets you rotate the character. May be different depending on the device you use!
CHARACTER TAB
The first tab allows you to change the following: Skin color
Hair color
Name
Height
Gender
Body Type
Head
Hair
CLOTHING TAB
Clothing tab allows you to change the shirt and the pants. Rintama uses classic 2D clothing. Should you enter the ID of the item in the wrong place it will not work!
ACCESSOIRES TAB
The Roblox Marketplace offers many different accessoires to be worn for characters. By COPYING the ID and PASTING it in the field you can add any item you like. Once added two new buttons will appear next to it. The setting circle icon will open up the option to scale, rotate and size whatever item you have. Hair will allow you to change the texture of it.
You are able to drag the field around by holding on it.
SAVING A CHARACTER
Once done creating the character you can hit SAVE and enter the game. Make sure you entered a name before saving.
Should you ever want to change a character you can press Customize Character in the phone settings and return to the creator.
Introduction
1. Welcome to Rintama High
Located within the city of Hokuheki located in the Rikugawa Prefecture of the Kobetsu Region is a school full with a turbulent and mysterious past.
The year is 2006 and the city is healing from the scars of it's past, and with a new administration set to replace the beloved Mayor Murai who guided the city through the ashes left from the corruption of his predecessor's administration, changes are certain but, however, the city is still home to a small criminal underworld, with a history of citizens ending up severely injured, dead, or missing as a result of encounters with groups within it.
The once delinquent plagued school, Rintama High, is actively taking measurements to fight the student violence within the school that damaged its once prestige reputation. Fights are still common, bullying is a daily occurance and many tend to lean against the faculty rules. Without a leading Bancho to rule the school this violence will only increase.
You ended up in Rintama High, most likely not by choice, but this is all you got so make the best out of it and stay alive!
2. Rintama Explained
Rintama High and its world is a fictional place in Japan somewhat located close to Kyoto in the center of Japan. Every player is able to create their own story and narrative as they see fit built around the school. The game is heavily focused on roleplay with the option of actual fist to fist combat best suited for player versus player. A passive mode exists for those who only want roleplay.
The game offers a huge amount of activities ranging from following a ingame schedule for class over to doing sports such as basketball, volleyball or soccer or even working a job to earn money which allows players to buy items or different combat styles. There are many other small activities to do, check out the game to test them all!
3. Private Communities
Private communities are not run by the Rintama Team or overseen by it!
Players are allowed to to create their own communities and servers within Rintama High however they must follow our guidelines and rules. Should a community not enforce those rules or damage the games reputation in any way they will be blacklisted from the game and our server. You can read our rules in: #📜 | o7-rules Furthermore you can open a ticket to get the community approved by us: #staff-help
Private Servers [COMING SOON]
Owning a private server grants you the ability to host your very own roleplay events within Rintama High. The owner is granted admin within the game and can change the setting to their liking, remove players or manage whole roleplay events! This allows for players to build their very own communities inside Rintama High without the disturbance of other players that may not follow specific rules.
Wave & Applications
1. What is Wave? How do I apply?
Wave is an influx of players who we accept into the game after they finish their applications. You apply when the google form drops in #pending-shouts, they currently aren't open because we already accepted a wave of new players! Wait a bit and create an OC so you can be ready! You need 250 messages at minimum before applying.
2. Do I have to pay to play? Do I have to buy my avatar?
You do not have to pay! Although, if you do not want to wait we have a patreon where you can buy instant access! There are different tiers of patreon, so check them all out to see the benefits! Access and in-game money are one time purchases, if you wish to keep anything else in your purchase benefits then you'll need to keep renewing the patreon!
You do not need to buy your avatar. There is an in-game feature that allows you to create an avatar with a string of code. There are videos and tutorials made for you to see. But, it's typically just inserting your codes into the format.
3. Do I have to make a character creation to get waved?
No, you do not need to make one to get waved. It's only for yourself and if you want access to give you feedback on your character so far.
4. Why don't you guys like introverts or foreigners?
Realistically, in 2000's Japan (even now, to be fair), foreigners are subject to discrimination, and back then, they rarely lived there. Patreon locking foreigners is meant to ensure realism, so we don't have 50 different people roleplaying as someone from another country. - Lore Team, Micha
Additionally, if your character is introverted, shy, or quiet, we will assume you won't interact with regular characters or lore characters, as well as plots. So, it turns into an instant denial. It also helps if you write your character to be flexible for any lore path, as you don't know what you'll end up with (horror, mystery, crime, etc), and if you already pre-set what your character is going to do, it most likely won't happen. - Lore Team, Micha
5. What causes an application to be denied in general?
When the application consists of writing the bare minimum (lack of detail, not meeting sentence requirements, generally just poorly written), unrealistic or edgy characters (you nor your characters family will have yakuza ties nor should you write about extremely traumatic events and go into detail about them, be aware there's minors on lore team that could potentially read your app), if your character isn't unique (repeating shy/introverted/always angry persona rather than stepping outside the box). - Lore Team, Micha
📄 Description
[RINTAMA HIGH] Welcome to Rintama High, a high school infamous for its troubled past. Located in the heart of Hokuheki City, Rikugawa Prefecture, Kobetsu, it was once a place ruled by gangs, violence, and delinquency. But those days are gone. Order has been restored, and the chaos that once plagued the school has finally been stamped out. "The future's really lookin' bright, isn't it?" Info: The game just released, expect some bugs or glitches. Read the ingame guide and keybinds. Check phone for more settings! Copy and paste ID's from the roblox marketplace in order to create a character! [Enter Codes in the phone menu!]